How to Pay for Coursera Plus Subscription or Buy a Separate Course with Cryptocurrency
#Payment Instructions
Coursera is an online education platform. It hosts courses, specializations, and large programs from universities and well-known companies. You learn at a comfortable pace — lectures, practice, and assessments are available in your account. Many programs award a certificate confirming that you have completed the material.
Not everyone manages to pay for their learning. Some keep their money in cryptocurrency, which Coursera does not accept. For others, a bank card fails on an international payment. Below we have put together a working solution for both cases — for a subscription and for a single course.
Choosing between Coursera Plus and a single course
There are two ways to pay on Coursera. You can buy a single course or take out a Coursera Plus subscription. The choice depends on how often and how much you study.
A single course
This option suits you when you need one specific skill. You pay only for the chosen program and complete it. It is a good choice if you are interested in a single topic and do not plan to take many courses. The payment is one-time, with no recurring charges.
Coursera Plus
The subscription unlocks access to a large library of courses at once. It suits those who study regularly. It is convenient for completing several specializations or working toward a certificate. You do not need to pay for each course separately — everything is included in the subscription. This works out cheaper when you have many programs ahead of you.
Why payment difficulties arise
The main problem for users who keep their funds in cryptocurrency is that you cannot pay Coursera directly with such assets. The platform accepts only bank cards, so you first have to exchange crypto for fiat and withdraw it to a card. Every extra step means lost time and fees. It is far more convenient to use a solution that lets you pay for purchases almost immediately after topping up with cryptocurrency.
Popular payment solutions
There are several workable methods. Which one is more convenient depends on the tools available to you and your preferences.
International bank cards
A bank card pays for Coursera without any workarounds. The difficulty lies in getting one. As a rule, you need an account abroad, and often a trip to the country with address confirmation. Cryptocurrency holders face an added snag. Such a card does not work with crypto. You would first have to sell the asset on an exchange and withdraw fiat, losing part of the money to fees.
Virtual cards for paying for services
When buying courses on these platforms, you do not have to use a regular bank card. An alternative is virtual cards, which exist only in digital form. Despite the absence of a physical medium, they have standard details — number, expiry date, and CVV code — so they are suitable for paying on Coursera and other international services.
Another advantage of such cards is the option to top up with cryptocurrency. You do not need to exchange your digital assets for fiat in advance or transfer money to a bank account. It is enough to load cryptocurrency onto the card and use it for online purchases.
Intermediary services for paying for subscriptions
Another option is to use specialized services that act as intermediaries when paying for subscriptions. You transfer money to them in a convenient way, after which the service pays for the order itself or takes out the subscription in its own name.
Payment intermediaries
A similar scheme is an intermediary that pays for a specific order at your request. It works when no other tools are left. The drawbacks are the same — a markup and dependence on someone else's service. You will no longer be able to manage such a payment.
Below is a comparison of all the methods.
| Payment method | Payment with cryptocurrency | Fees | Is it hard to set up | |
|---|---|---|---|---|
| Bank cards | Payment with cryptocurrencyNo, you have to sell | FeesLosses on conversion and withdrawal | Is it hard to set upHigh — issued by banks that are not available everywhere | |
| Specialized subscription payment services | Payment with cryptocurrencyOften no | FeesIntermediary fee | Is it hard to set upLow, but the payment goes through a third party | |
| Payment intermediaries | Payment with cryptocurrencyDepends on the intermediary | FeesMarkup for a one-time payment | Is it hard to set upLow, but you do not control the payment | |
| Virtual cards (Mirocard) | Payment with cryptocurrencyYes, topped up directly with cryptocurrency | FeesFixed fee for issuance and top-up | Is it hard to set upLow — online setup in a couple of minutes |
Paying for Coursera with a Mirocard virtual card
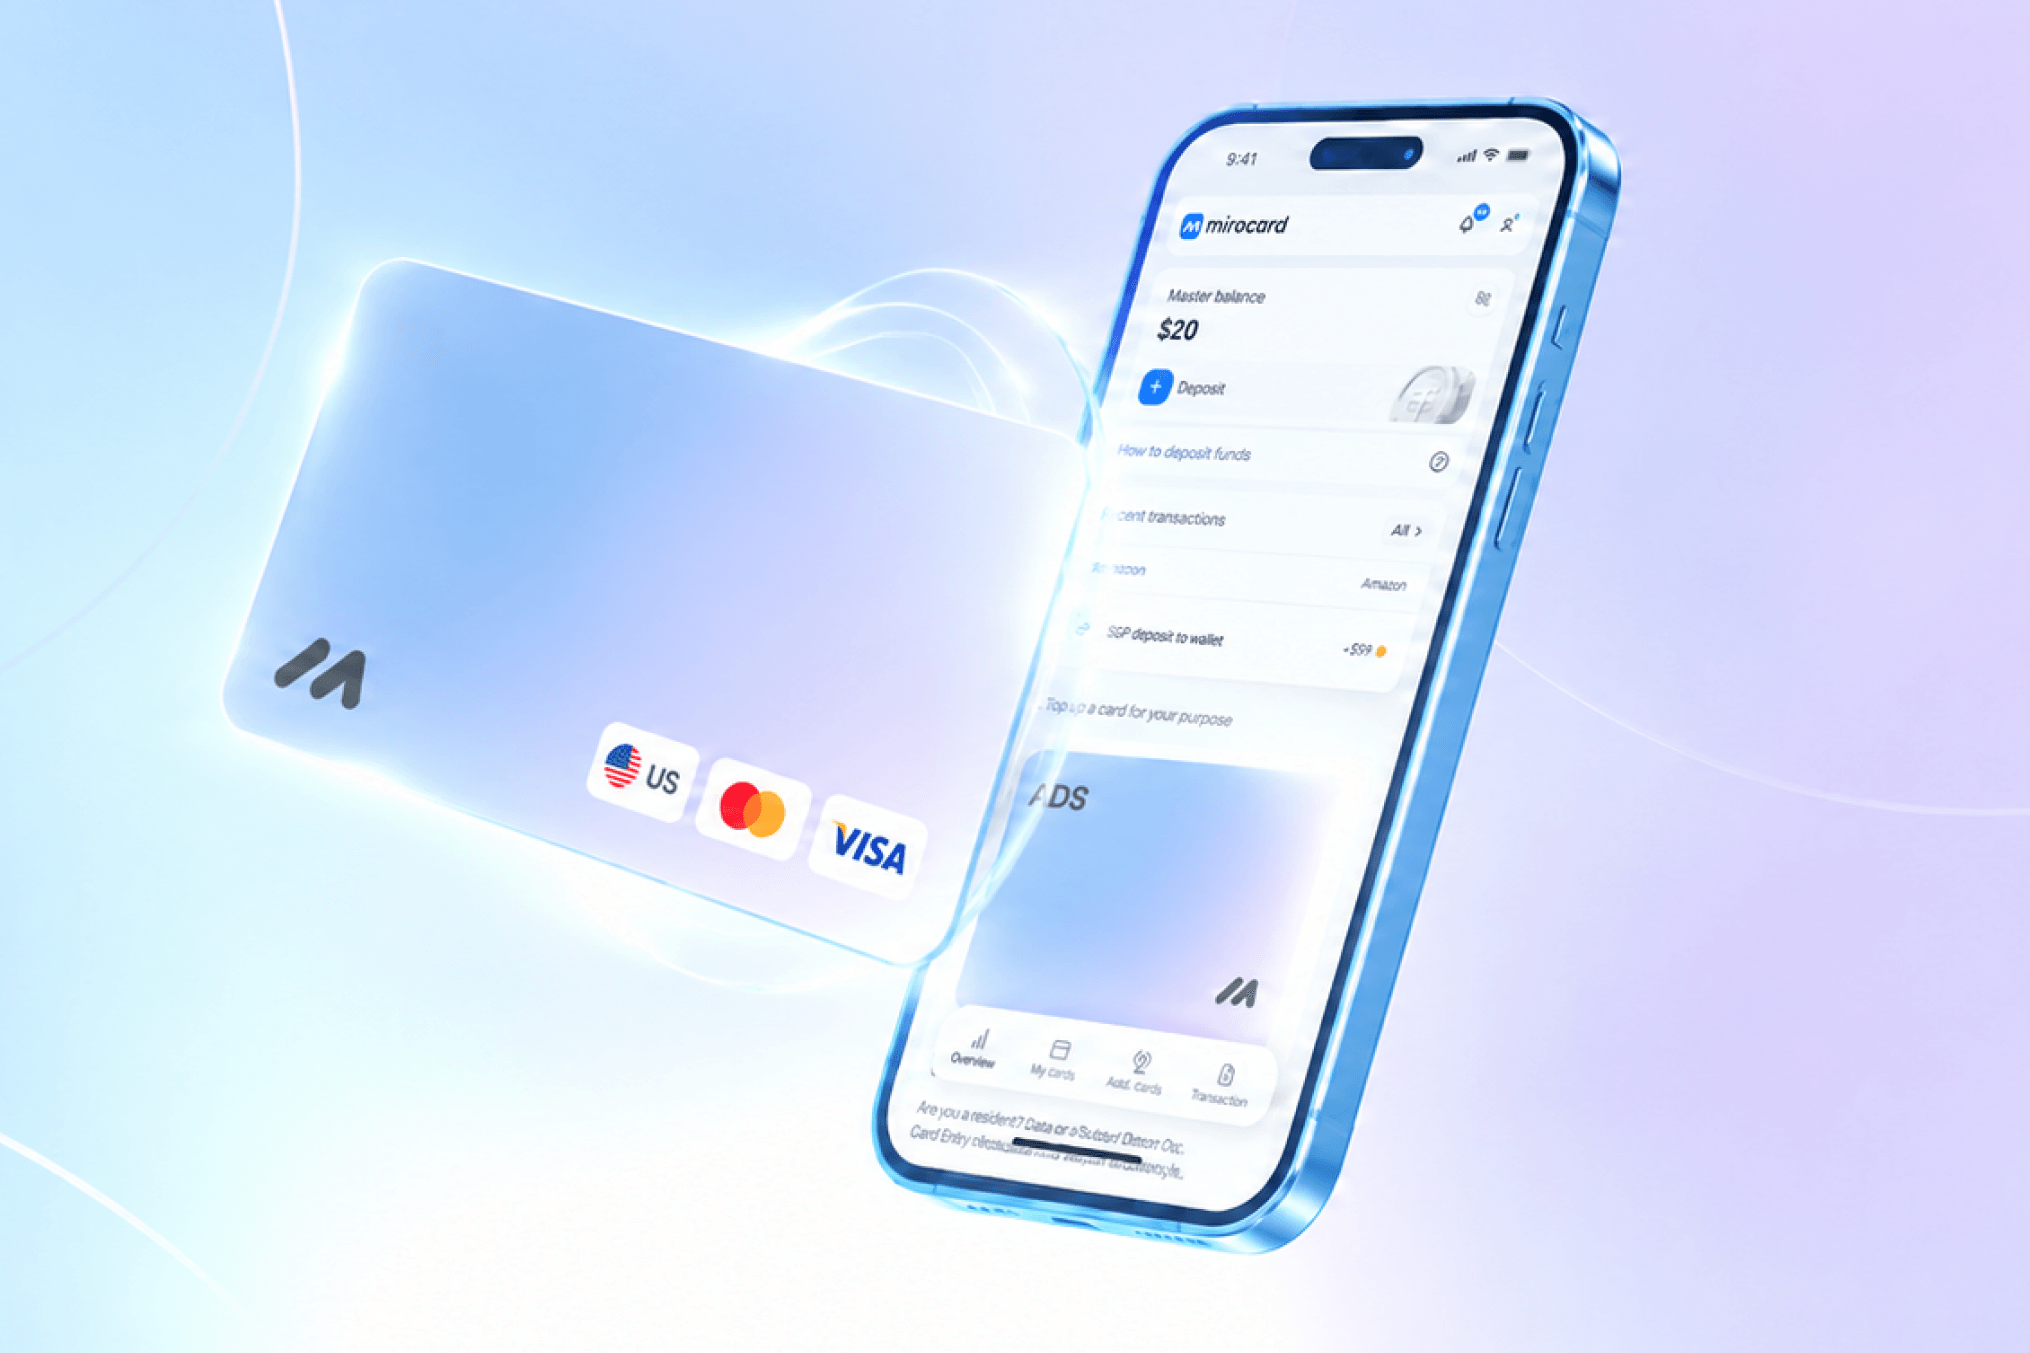
To pay for Coursera learning with cryptocurrency, first issue a Mirocard virtual card. You can use it on international online platforms just like a regular bank card, and it is topped up directly with digital assets.
If you plan to use Coursera Plus, it is better to issue a separate card specifically for the subscription. It is designed for recurring charges, so subsequent payments will go through automatically. This card is also perfectly suitable for a one-time purchase of a single course. Issuance starts at 10 dollars, and the top-up fee is 4%.
Most popular cryptocurrencies are supported.
First you need to set up the card. The whole process takes about 30 minutes and is done entirely online.
Step 1. Creating an account
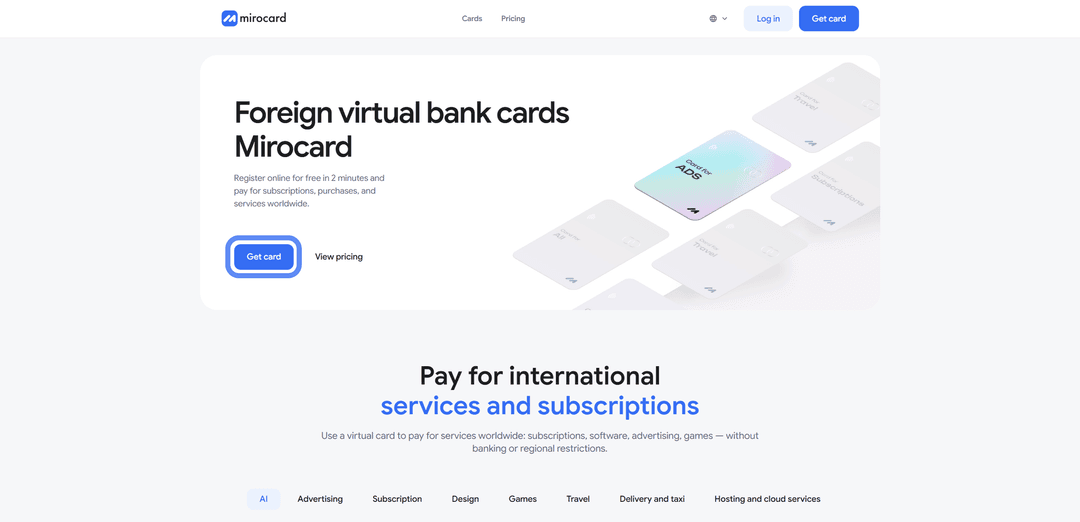
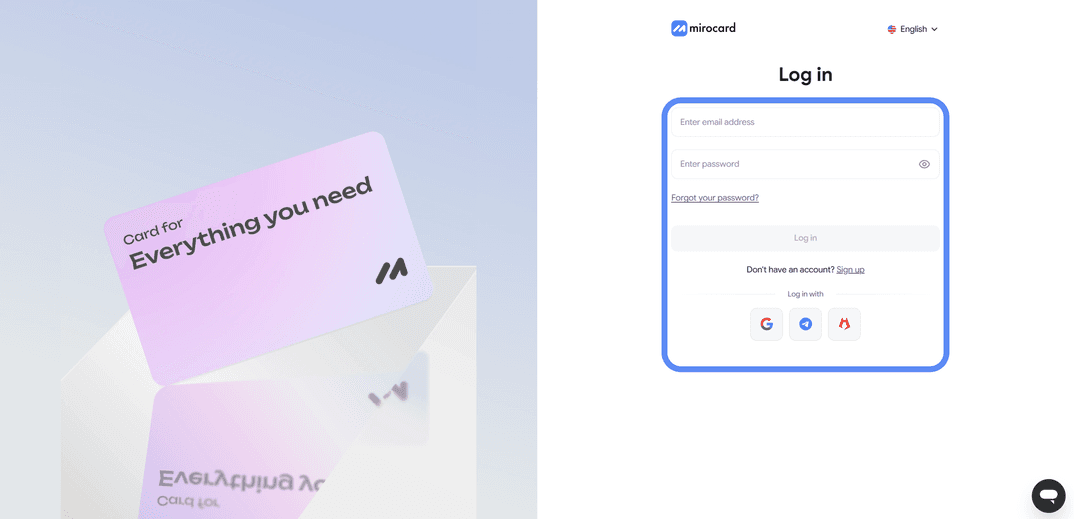
To start, open the Mirocard website. If you are using the service for the first time, register: enter your email address, set a password, and confirm your account via the link in the email. Heleket users can skip this step and log in through their existing profile — all data will be pulled into Mirocard automatically.
Step 2. Topping up the Master Balance
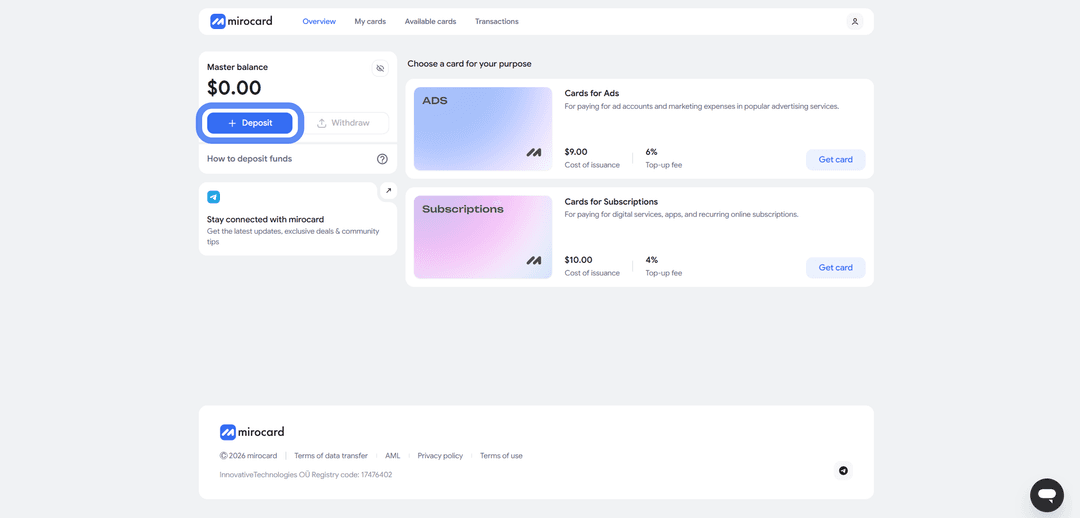
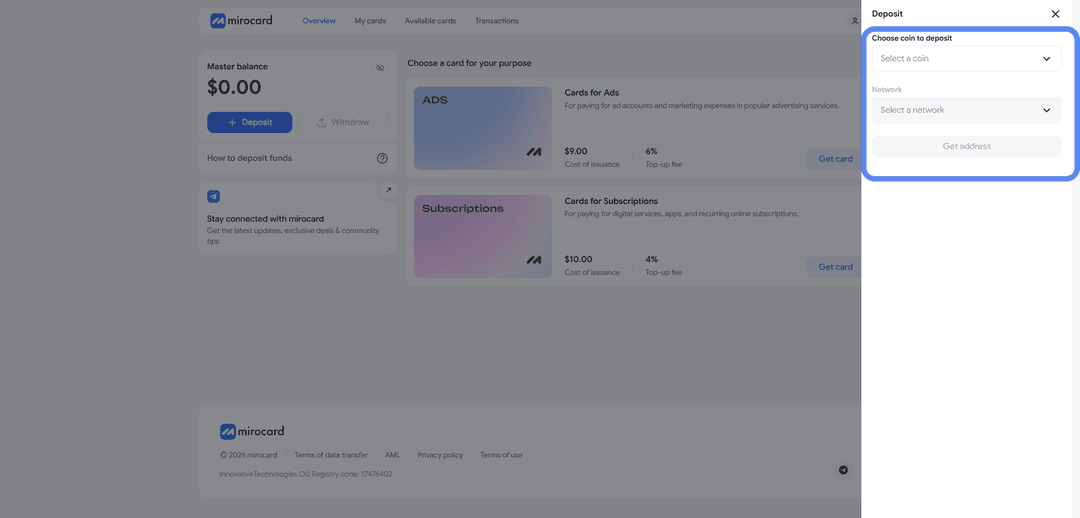
Before issuing the card, you need to top up your internal account. To do this, go to the "Master Balance" section, select the top-up option, and specify the cryptocurrency and network you want. After that, the system will show a wallet address to which you need to send the transfer. As soon as the transaction receives the required number of confirmations, the funds will arrive in your balance. The most cost-effective way to top up is USDT via the TRC-20 network thanks to low fees.
Step 3. Setting up the card
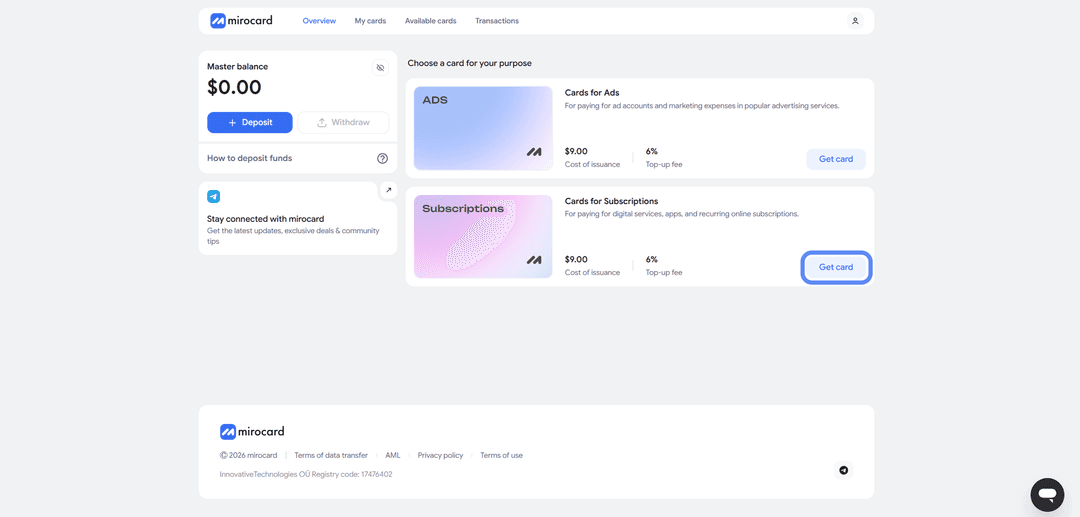
After topping up, open the catalog of available cards and choose the option intended for subscriptions and recurring online payments. Proceed to setup by clicking the button to get the card.
Step 4. Identity verification
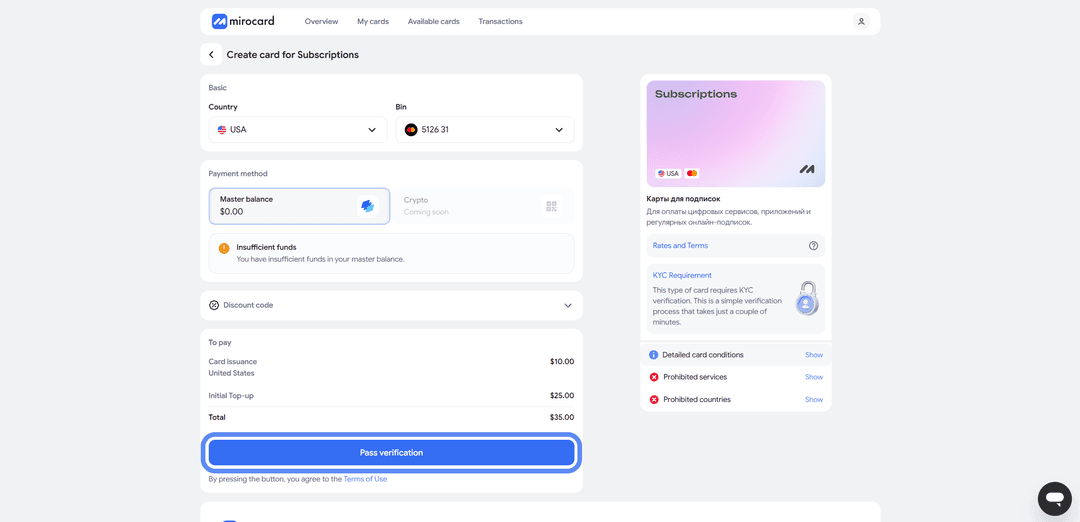
To complete setup, you will need to go through the KYC procedure. Upload your documents following the service's instructions and wait for the check to finish. After successful verification, full limits on holding funds, topping up, and making payments become available.
Step 5. Completing setup
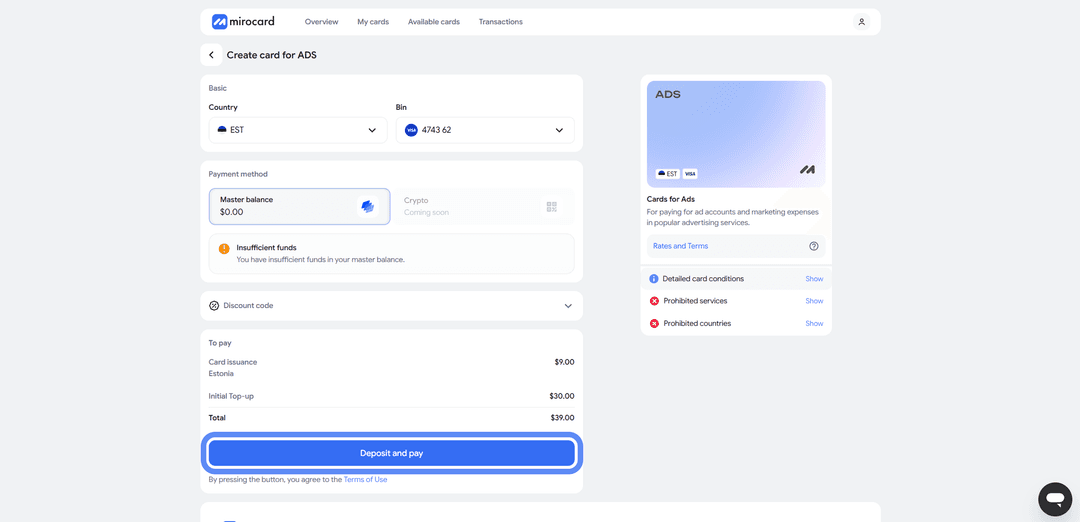
Once identity verification is complete, all that is left is to confirm the card issuance. The creation fee is 10 dollars and is charged from the Master Balance. Any funds above this amount are automatically credited to the card, so you can use them right after setup.
Step 6. Getting started
Right after issuance, the card becomes available in your Mirocard account. There you can view its details, check your remaining balance, and see the history of all transactions. No additional steps are needed to activate it — you can use the card right after it is created. If necessary, you can top up the card in the same section.
It is recommended to keep a small reserve of funds on the account. Sometimes the service performs a verification authorization before charging, and a small balance will help avoid a declined payment.
How to buy a single course on Coursera
If you need not a Coursera Plus subscription but only a single course, the payment process is almost the same.
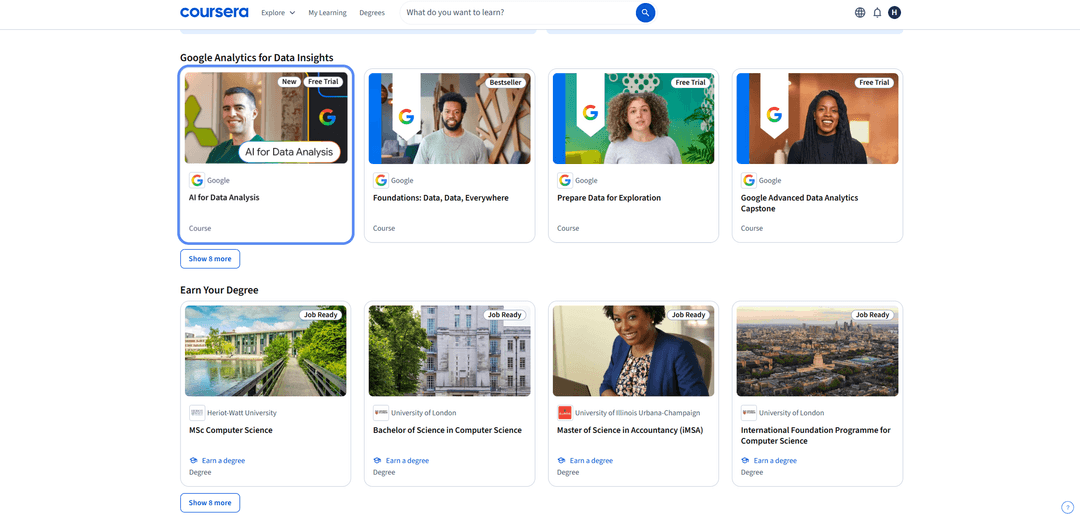
Step 1. Choose a course
Open the Coursera homepage or catalog, find the area you are interested in — for example, data analytics, business, programming, or marketing — and go to the page of the chosen course.
Step 2. Start registration
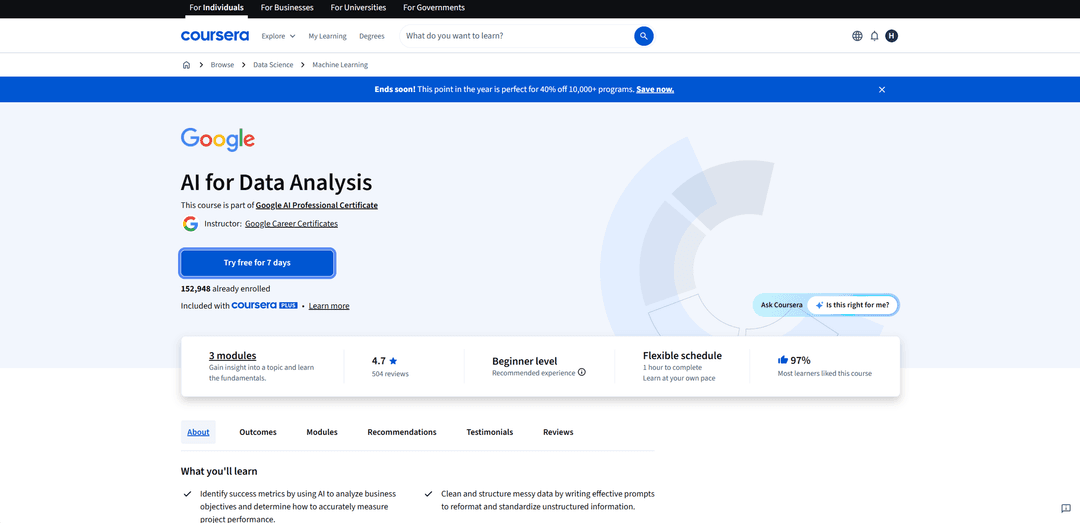
The course page has all the information — the syllabus, difficulty level, schedule, and reviews. It also shows whether the course is included in Coursera Plus and whether there is a free trial period. To get access, click "Enroll for Free".
Step 3. Enter your card details and pay
The same page with payment information will open. Enter your name, select the card's country, and fill in your Mirocard details — number, expiry date, and verification code. On the right, check the order contents and the amount. If the course has a trial period, the "Total due today" line will show zero — the money will be charged later. Click "Start free trial". When there is no trial period, payment goes through immediately, and the button is named differently.
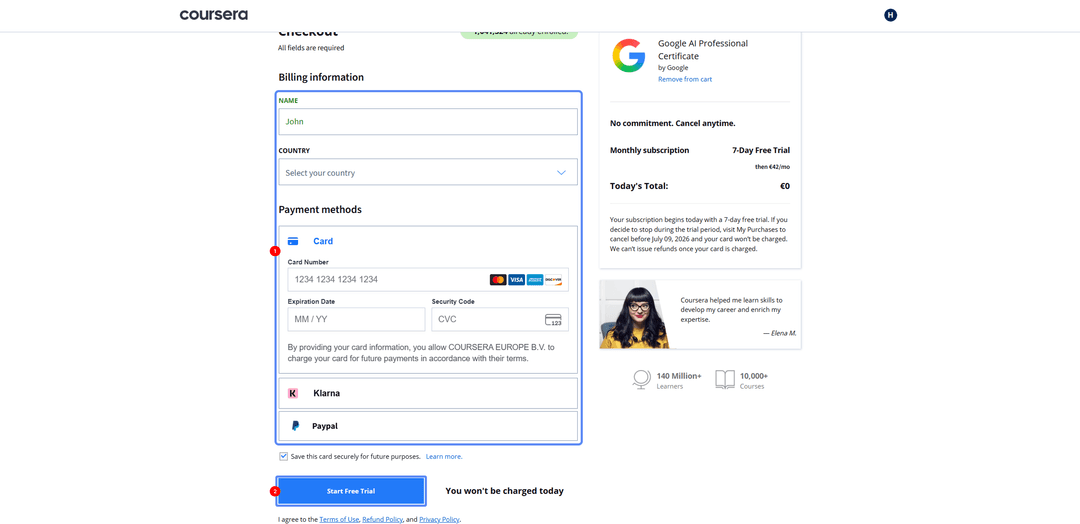
If you do not plan to continue after the trial period, cancel the subscription in advance on the "My Purchases" page. Then no charge will be made.
How to pay for a Coursera Plus subscription via Mirocard
Coursera Plus is activated on the subscription page. Payment goes through quickly; all you need is a ready Mirocard with money on its balance.
Step 1. Open the Coursera Plus page
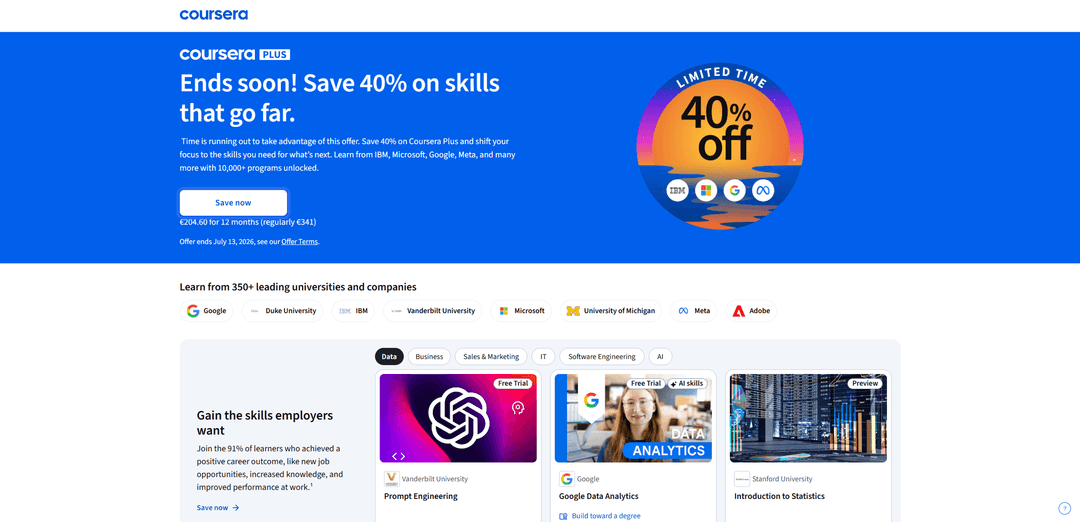
Go to the Coursera Plus page. It gathers the subscription terms. There are usually two payment options — annual and monthly. The annual one works out cheaper per month. A promotion is often running, and the page shows the old and new prices. It also lists the free trial period, during which you can opt out without a charge. The exact amount depends on the plan, country, and current promotion. Review the terms and click "Save now".
Step 2. Enter your payment details
When the payment page opens, fill in all the required fields with your Mirocard details. Enter the cardholder's name, card number, expiry date, and CVV code. In the list of countries, choose the one specified when the card was issued.
The necessary data is always available in your Mirocard account, so you can copy it quickly. Before the funds are charged, check the final cost of the order. If the service offers to save the card for future payments, uncheck this box if needed and complete the purchase with the "Pay" button.
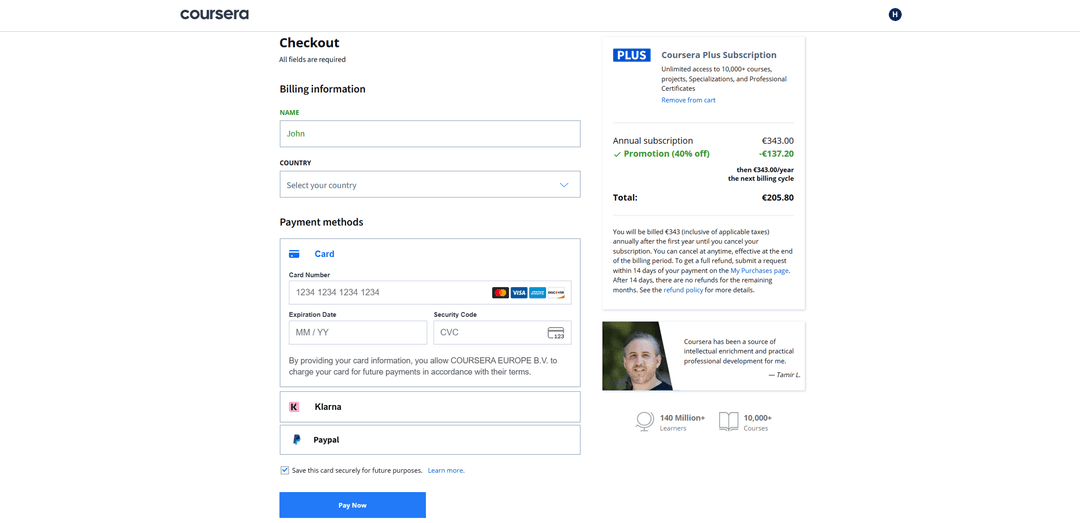
The subscription activates immediately after payment. Then Coursera renews it itself and charges the card. To keep renewals uninterrupted, keep an eye on the card balance.
What to consider before buying
Before paying, run through a few points. This will help you avoid unnecessary charges and hiccups at renewal.
- Cost. Double-check the final figure in the order block. It varies by plan, country, and current discount. Keep a little extra on the card for the verification request at payment.
- Renewal terms. Coursera Plus and courses with a trial period renew without reminders. If you do not plan to continue, turn off renewal in time via "My Purchases".
- Refunds. After payment, Coursera has a window when you can actually get your money back. The rules are posted right on the payment page — read them before confirming.
- Access format. Check exactly what you are paying for — materials, assignments, a certificate. The set differs between a one-time course and a subscription.
Conclusion
There are plenty of ways to pay for Coursera. A bank card handles it right away, but it is hard to get and cannot be topped up with crypto. Intermediaries charge a fee and take away your control over the payment. A virtual card topped up with crypto wins on speed and price.
Mirocard here behaves like a familiar Visa, only its balance is loaded with cryptocurrency. Setup is one-time — after that, a Coursera Plus subscription or a single course is paid for directly with cryptocurrency. This card will also come in handy on other platforms.