Як купити міжнародні авіаквитки на Skyscanner за допомогою криптовалюти
#Інструкція з оплати
Skyscanner — це популярний агрегатор перельотів. Сам він квитками не торгує — його завдання прочесати сотні авіакомпаній і туристичних агентств, звести всі ціни на один екран і підказати, де виходить вигідніше. Достатньо вказати звідки, куди і коли ви летите, далі платформа за секунди порівнює тарифи і видає добірку. Фінальну покупку ви здійснюєте вже на майданчику продавця, куди сервіс вас спрямує.
З оплатою щастить не кожному. В одних гроші лежать у криптовалюті, а продавці квитків такий формат не приймають. В інших банківська картка спотикається на міжнародному платежі. Нижче розберемо обидва глухі кути і покажемо, як їх обійти.
Чим Skyscanner такий зручний для мандрівників
Цінність сервісу у двох речах — зекономленому часі та грошах. Не потрібно вручну обходити десяток сайтів перевізників, усі пропозиції вже зібрані в одному вікні. Нерідко виявляється, що ідентичний рейс в іншого продавця коштує відчутно менше, і Skyscanner це одразу показує.
Окремо виділимо кілька інструментів, заради яких повертаються на сервіс. Пошук за гнучкими датами підказує, в які дні летіти дешевше — зсув вильоту на добу часом помітно збиває ціну. Режим «Пошук всюди» стане в нагоді, коли напрямок ще не обрано: вводите бюджет, а платформа пропонує, куди на нього можна полетіти. А відстеження цін надішле повідомлення, варто квитку на потрібний рейс подешевшати.
Як відбувається купівля квитка
Логіку варто розуміти заздалегідь, бо гроші в підсумку списує не Skyscanner, а сторонній продавець.
Усе починається з напрямку. Ви вбиваєте міста вильоту та прильоту, дати й кількість пасажирів, а сервіс видає список відповідних рейсів із цінами. Потім настає етап порівняння. Один і той самий переліт зазвичай пропонують відразу кілька продавців — сама авіакомпанія та агентства-посередники. Skyscanner вибудовує їх поруч із ціною та рейтингом, щоб ви обрали, у кого купувати.
Щойно продавця обрано, сервіс перекидає вас на його сайт. Саме там ви вводите дані пасажирів і доходите до оплати. Цей останній крок і є вузьким місцем — тут потрібна картка, яка пройде міжнародний платіж, і тут у багатьох усе стопориться.
Що робити, якщо виникли складнощі з оплатою
Власнику криптовалюти заважає одна річ — квиткові майданчики крипту в оплаті не підтримують. Приймають вони картки, PayPal і споріднені системи. Тож при капіталі в USDT, BTC або Ethereum пряма оплата відпадає: монети спочатку йдуть на біржу, звідти фіат перебирається на рахунок, і лише тоді до справи підключається картка — а кожен такий перехід відгризає частину суми комісіями.
Які варіанти є, якщо платити звичайною банківською карткою незручно
Картки банків інших країн
Така картка на сайті продавця відпрацьовує штатно — для системи це звичайна Visa або Mastercard з регіону, де обмежень немає. Загвоздок із нею дві, і обидві б'ють по одній аудиторії. Криптою її не поповнити, тому власнику цифрових активів однаково доведеться ганяти гроші через біржу туди-назад. А сам випуск вимагає фізичної присутності — банки інших країн зазвичай просять прийти особисто і довести, що ви там живете.
Сервіси-посередники
Ідея посередника в тому, що стороння людина або сервіс оплачує ваш квиток зі своєї картки, а ви компенсуєте йому суму будь-яким зручним способом, криптою зокрема. Розплата за зручність — комісія зверху, найчастіше п'ята-третя частина вартості. І якщо для підписки зайва година ролі не грає, то з квитками вона критична: тарифи живуть хвилинами, і поки гроші йдуть посереднику, знайдена ціна нерідко встигає змінитися. Окремо висить питання довіри — передоплату ви вносите наосліп.
Віртуальні картки
Тут зв'язка вибудована під власника крипти. Картка існує лише у вигляді реквізитів, фізичного носія немає, але продавцю цього достатньо — він бачить повноцінну міжнародну картку. Ключовий момент у тому, що поповнити її можна прямо криптовалютою: активи заходять на баланс, а списується вже фіат, звичний будь-якому сайту. Ні біржа, ні рахунок у банку в ланцюжку не беруть участі. Плюс випуск займає хвилини і проходить вдома, а це рятує, коли квиток потрібен тут і зараз.
Порівняння способів оплати
| Спосіб оплати | Працює з криптою | Як отримати | Швидкість | Ризики | |
|---|---|---|---|---|---|
| Картка банку іншої країни | Працює з криптоюНі, лише через біржу | Як отриматиСкладно для деяких | ШвидкістьОдразу | РизикиНизькі | |
| Сервіс-посередник | Працює з криптоюТак, але чужими руками | Як отриматиПросто | ШвидкістьПовільно | РизикиНацінка, залежність від сервісу | |
| Віртуальна картка (Mirocard) | Працює з криптоюТак, поповнення криптою | Як отриматиОнлайн за хвилини | ШвидкістьОдразу | РизикиНизькі |
Оплата авіаквитків через Mirocard
Коли рахунок надходить від агентства або самої авіакомпанії, виручають віртуальні картки — серед них нерідко зупиняються на Mirocard. Картки тут будуються на Visa та Mastercard, поповнюються криптовалютою, а в процесі оплати продавець не відрізнить таку картку від звичайної міжнародної.
Для квитка підходить варіант із лінійки «для підписок» — разовий платіж він тягне спокійно. Тарифікація стандартна: десять доларів за випуск, чотири відсотки на поповненні, детальніше можете подивитися у своєму кабінеті. Поповнити баланс вийде практично будь-якою популярною монетою. Гроші з біржі або гаманця падають на рахунок за лічені хвилини. Картка після цього нікуди не зникає, тож нею ж потім оплачують ночівлю, оренду авто та інші дорожні витрати — джерелом скрізь слугує один криптобаланс.
Як випустити картку Mirocard
Оформлення картки займає небагато часу, тому пройти всі етапи можна безпосередньо перед оплатою квитків.
Спочатку відкрийте сайт Mirocard і перейдіть до випуску нової картки. Якщо ви користуєтеся сервісом уперше, зареєструйтеся, вказавши адресу електронної пошти та пароль, а потім підтвердьте створення акаунта за посиланням із листа.
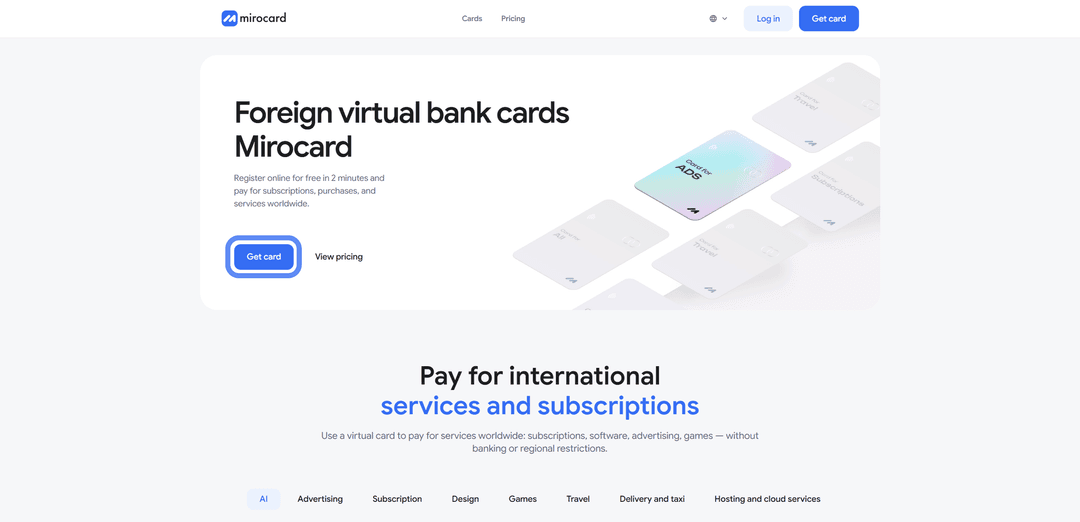
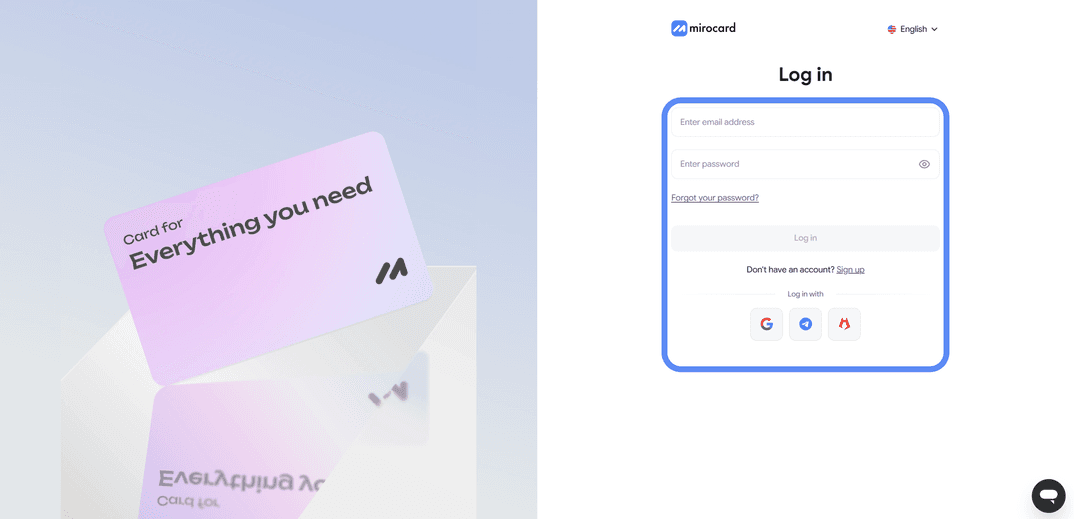
Користувачі Heleket можуть одразу авторизуватися через наявний профіль — дані акаунта та баланс будуть доступні автоматично.
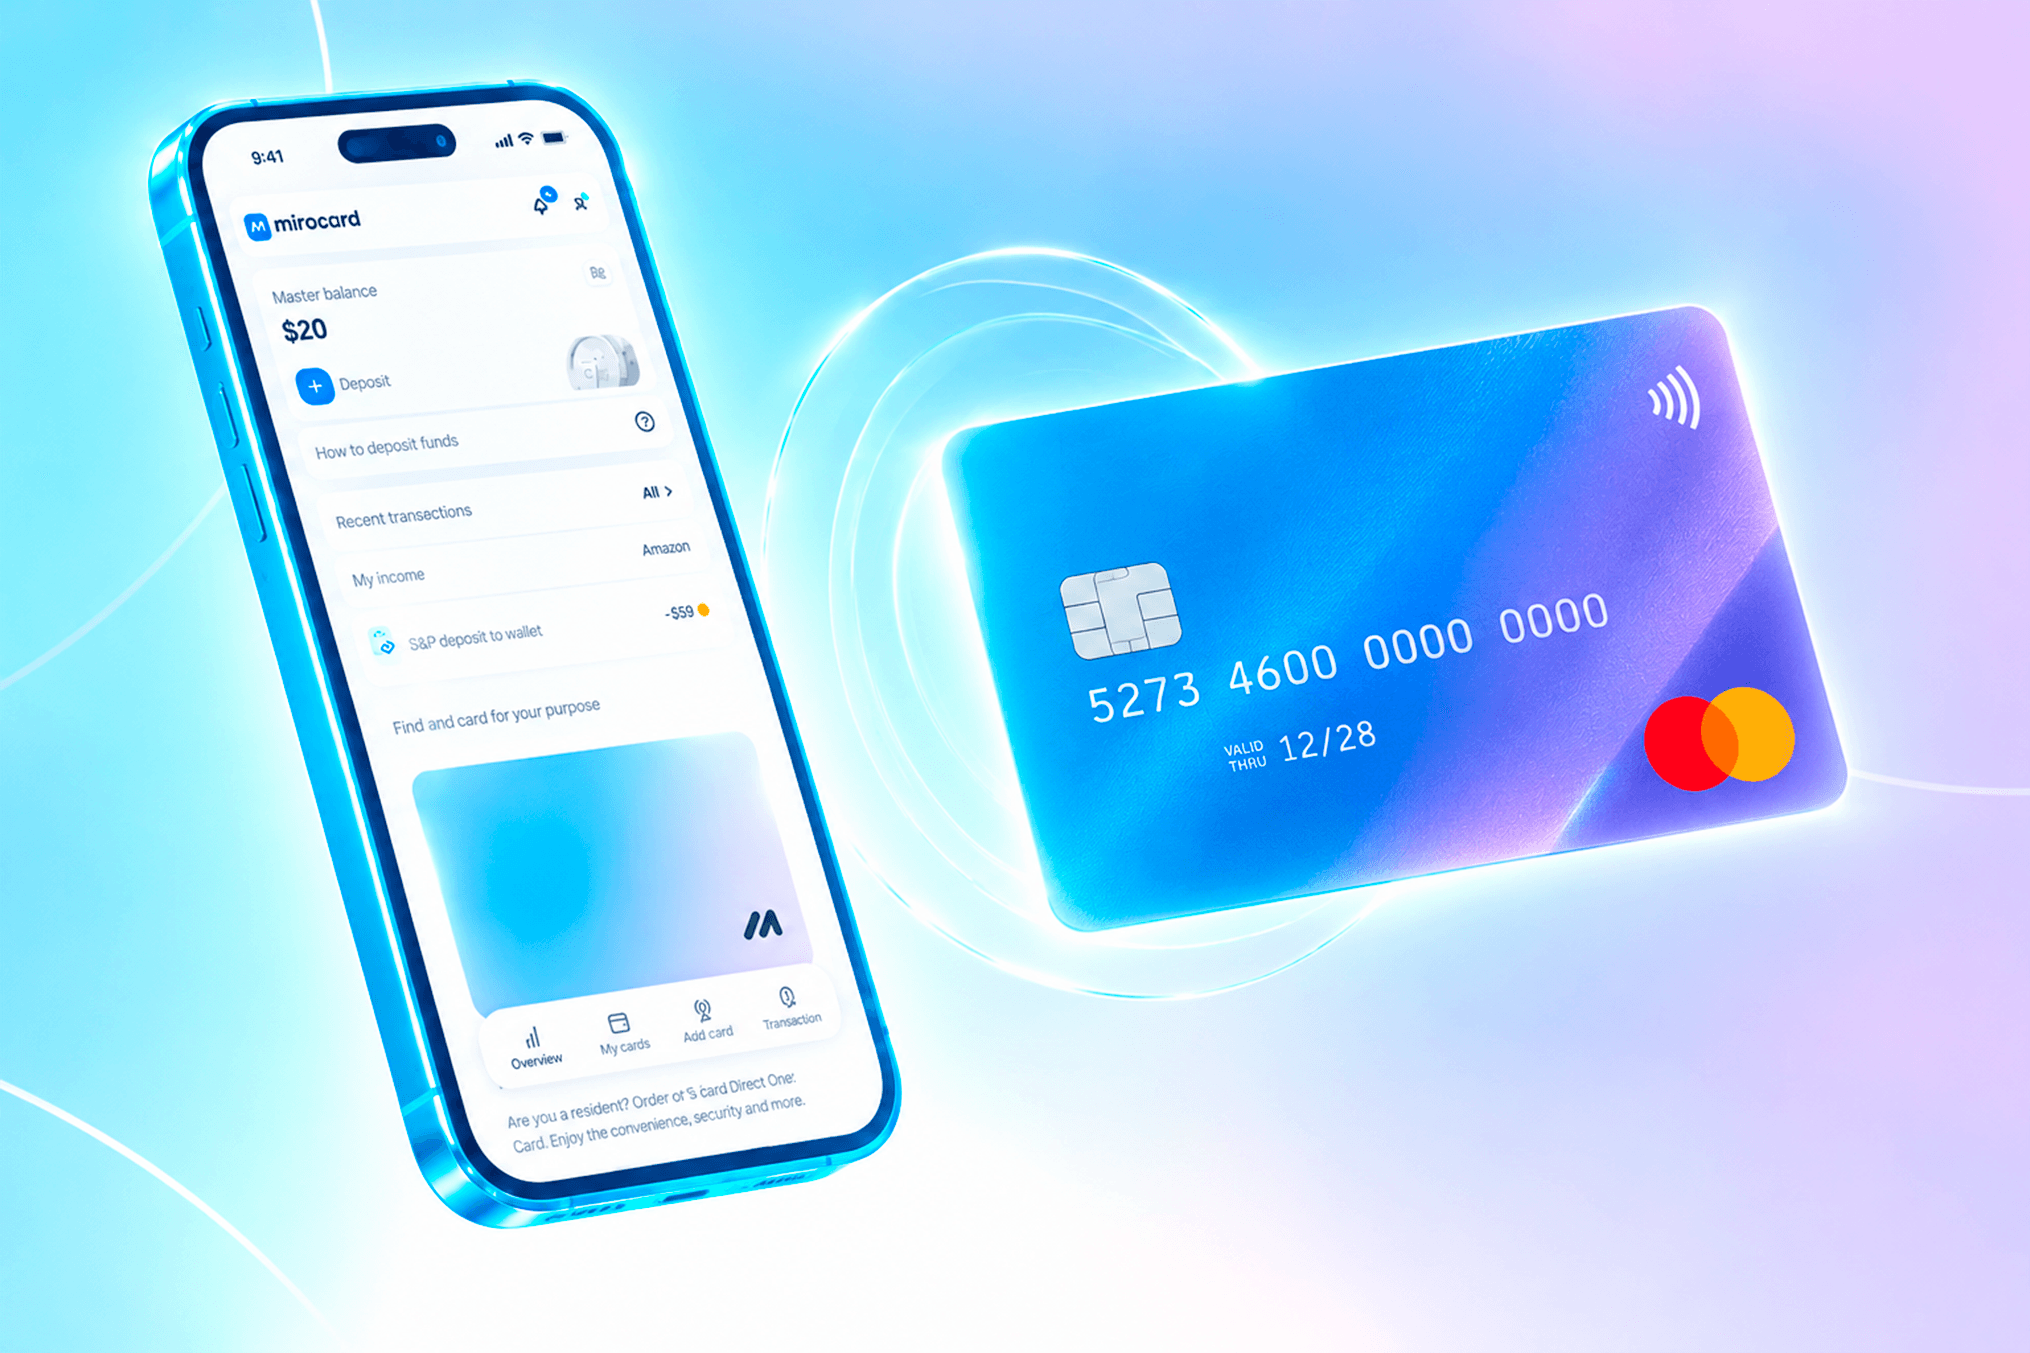
Перед випуском картки необхідно поповнити «Майстер-баланс». Це внутрішній рахунок, який використовується для оплати випуску та подальшого поповнення віртуальних карток. Виберіть криптовалюту та мережу, отримайте адресу для переказу і надішліть кошти зі свого гаманця або біржі.
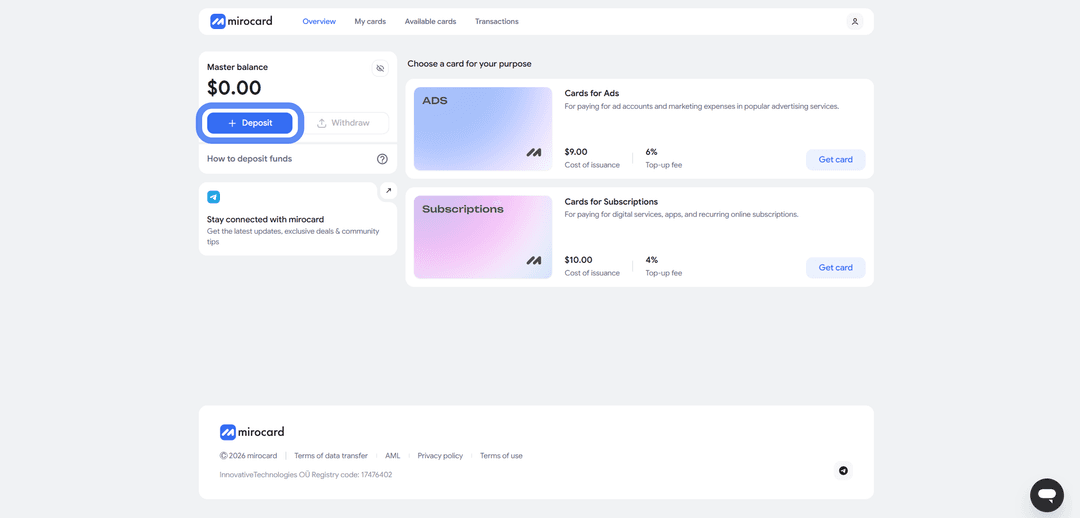
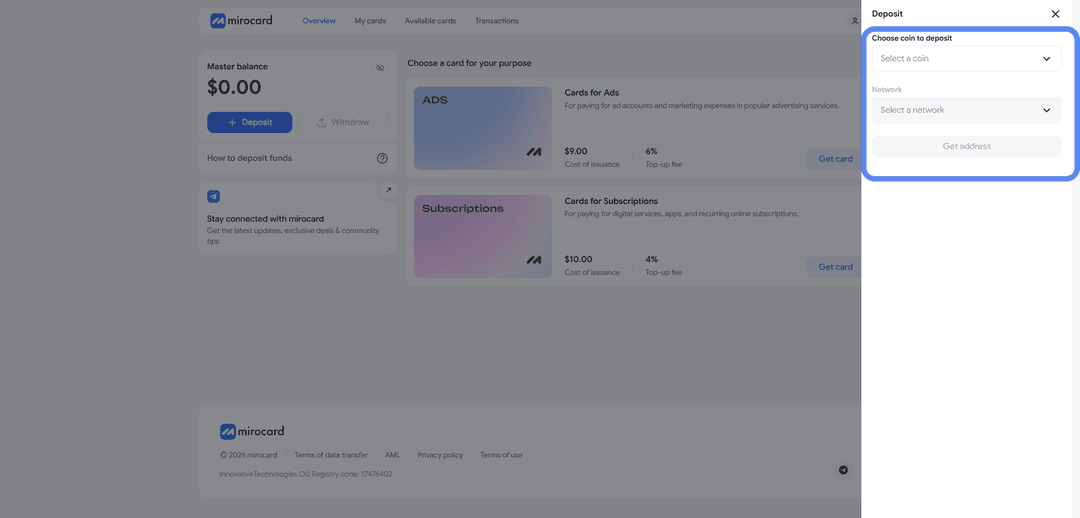
Після підтвердження транзакції гроші надійдуть на баланс. Для зниження комісій зазвичай обирають USDT у мережі TRC-20.
Коли кошти будуть зараховані, відкрийте каталог карток і виберіть підходящий варіант.
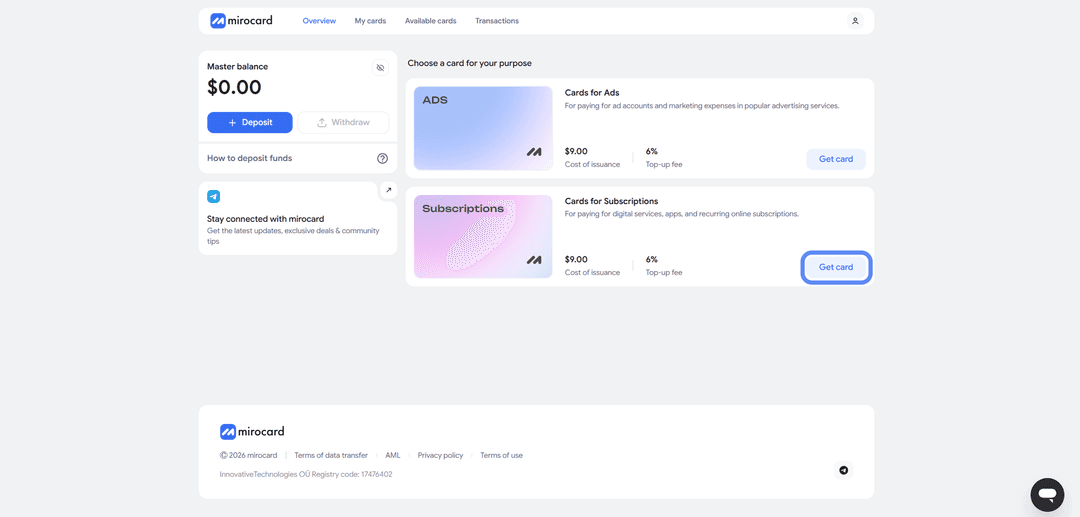
Потім почніть оформлення та пройдіть верифікацію особи. Для цього потрібно буде завантажити документи. Перевірка не лише захищає акаунт від несанкціонованого доступу, а й відкриває повні ліміти на операції.
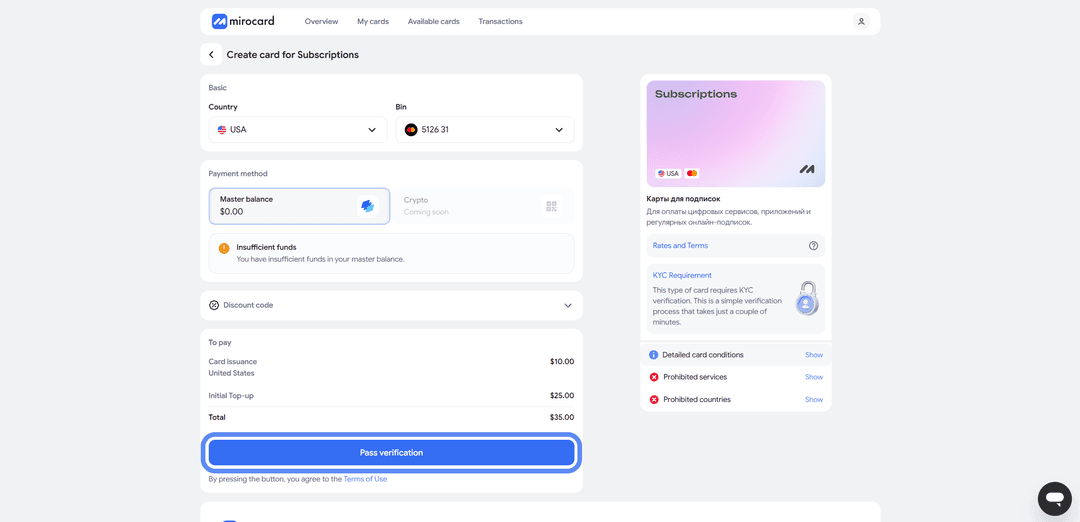
Після успішної перевірки залишиться підтвердити випуск картки. Вартість оформлення становить 10 доларів і списується з Майстер-балансу. Якщо на внутрішньому рахунку залишаться кошти, вони автоматично будуть переведені на баланс нової картки.
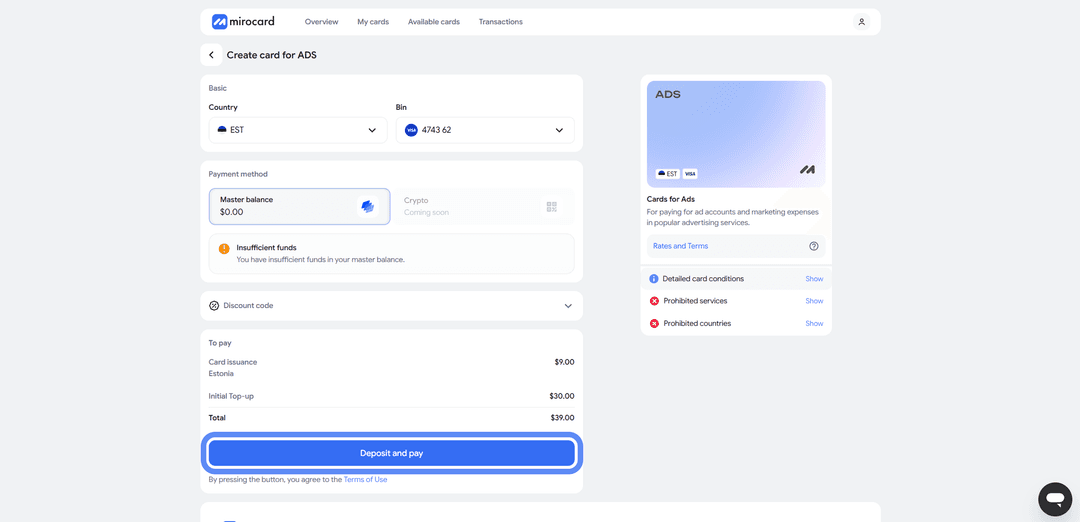
Одразу після випуску картка з'явиться в особистому кабінеті разом із повним набором реквізитів. Її можна використовувати без додаткової активації. У цьому ж розділі доступні поточний баланс, історія операцій та інструменти для повторного поповнення.
Перед оплатою рекомендується залишити на картці суму з невеликим запасом. Деякі сервіси тимчасово резервують додаткову суму, щоб перевірити платіжний засіб. Пізніше ці кошти розблокуються, однак при недостатньому балансі операція може бути відхилена.
Як купити квиток на Skyscanner з карткою Mirocard
Картка готова — переходимо до покупки. Майте на увазі, що фінальна оплата пройде не на Skyscanner, а на сайті продавця, куди сервіс вас спрямує.
Крок 1. Задайте маршрут
Відкрийте Skyscanner.com і увійдіть в акаунт. Впишіть місто вильоту, напрямок, дати і кількість пасажирів.
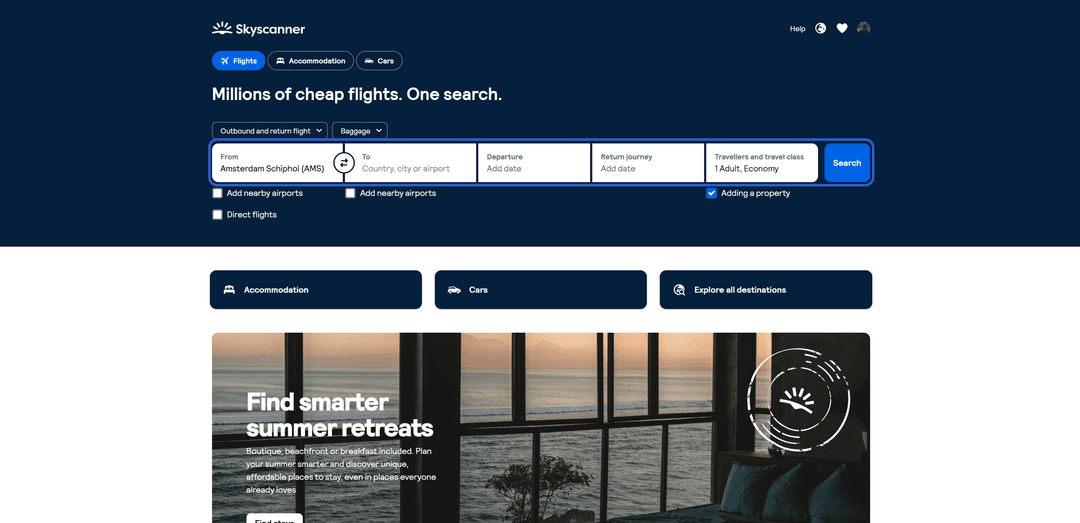
Якщо самі ще не вирішили, куди летіти, поставте в поле призначення «Будь-куди» — сервіс покаже варіанти під ваш бюджет. Натисніть «Пошук».
Крок 2. Виберіть напрямок і рейс
За конкретним маршрутом одразу відкриється список рейсів. Якщо шукали за регіоном, спочатку виберіть місто з добірки. Відсійте зайве фільтрами — за кількістю пересадок, ціною, часом у дорозі. Знайшли підходящий рейс — натисніть на нього, щоб розкрити деталі та побачити продавців.
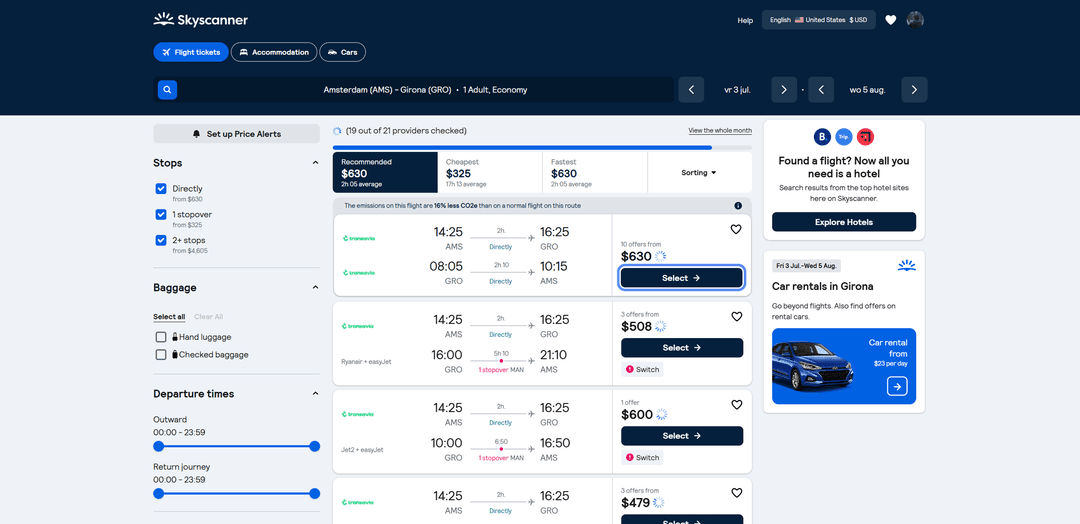
Крок 3. Виберіть продавця
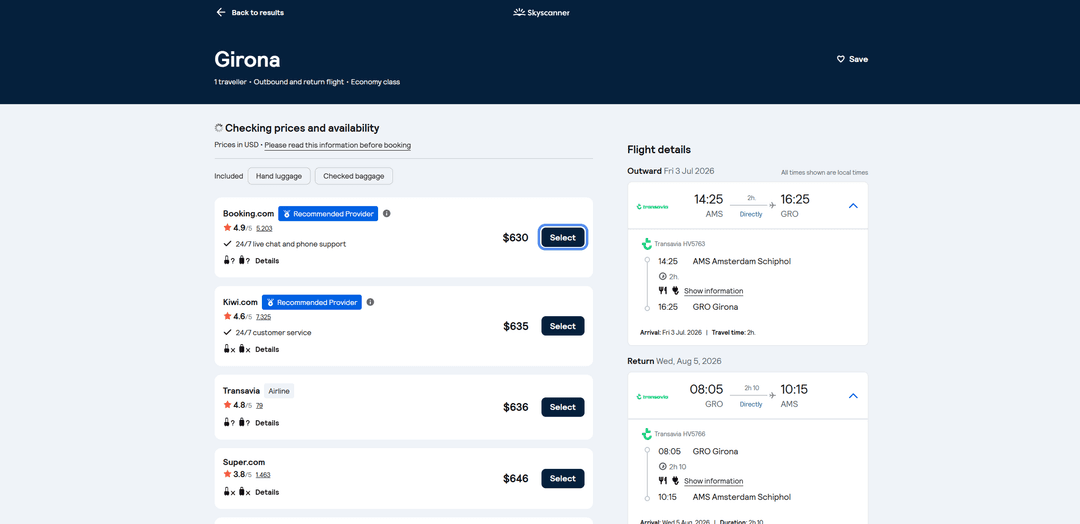
Крок 4. Перейдіть на сайт продавця
Сервіс перекине вас на майданчик обраного продавця. Усе подальше відбувається вже там. Оформлення в кожного своє, але логіка однакова — спочатку дані пасажирів, потім оплата.
Крок 5. Введіть дані пасажирів
Заповніть імена латиницею суворо як у закордонному паспорті, дати народження та номери документів. Перевіряйте уважно — помилку в квитку потім виправити складно і часом платно. Якщо продавець пропонує багаж або вибір місця, додайте їх тут.
Крок 6. Оплатіть карткою Mirocard
Дійшовши до оплати, відзначте, що платитимете карткою. Перенесіть у поля реквізити Mirocard — власника, номер, термін та CVC-код, усе це зберігається у вашому кабінеті Mirocard. Якщо запросять адресу для рахунку, впишіть справжню адресу тієї країни, до якої належить картка.
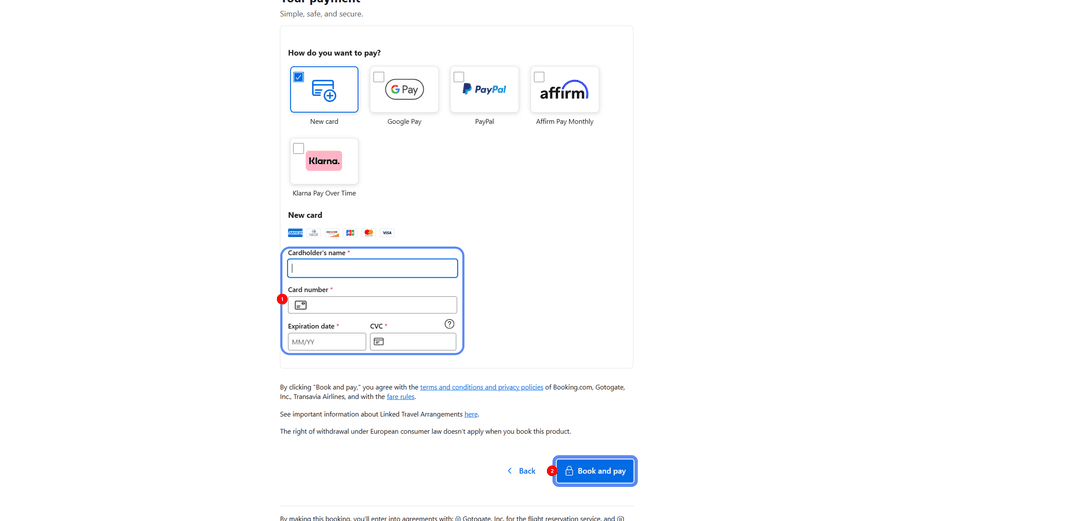
Крок 7. Підтвердьте покупку
Пробіжіться по деталях замовлення та сумі, після чого тисніть кнопку підтвердження — як правило, це «Забронювати та оплатити». Списання відбудеться миттєво, а квиток впаде на вказаний email. Номер бронювання та підтвердження краще зберегти.
Якщо оплата не проходить
Почніть із балансу — на ньому має вистачати коштів з огляду на передавторизацію. Потім перевірте реквізити на помилки, насамперед CVC-код. Коли все введено правильно, а платіж усе одно не йде, звірте адресу картки і повторіть спробу за кілька хвилин. Майте на увазі — за цей час вартість квитка може встигнути змінитися.
Висновок
Розшукати квиток через Skyscanner — справа нехитра: сервіс виводить на найкращу ціну і передає естафету продавцю. Складність виникає на етапі оплати. Картки банків інших країн проходять, але їх важко оформити, і з криптовалютою вони не працюють. Посередники беруть націнку і для купівлі квитків працюють надто повільно. Віртуальна картка вирішує обидві проблеми — швидко, недорого і з підтримкою крипти.
Mirocard тут виступає звичайною Visa, тільки живиться вона криптовалютою. Один раз налаштували — і перельоти оплачуються напряму з криптогаманця, без прогону грошей через біржу у фіат. Нею ж потім закриєте готель, оренду авто та інші витрати в дорозі.
Тим, у кого заощадження в крипті, це найкоротший маршрут від активів до квитка без проміжних обмінів. А кому звичайні міжнародні картки недоступні — для них віртуальна картка була і залишається надійним пропуском до перельотів через Skyscanner у будь-якого його продавця.