How to Pay for a ChatGPT Subscription with Cryptocurrency
#Payment Instructions
ChatGPT has become one of the primary work tools for millions of people worldwide. Some use it as an assistant for writing code, others for data analysis, others for routine tasks like emails and copy. The free version is enough for simple requests, but the real capabilities only open up with a paid subscription.
The problem is that it is not possible to pay for ChatGPT Plus directly with cryptocurrency. Today we will explain why this is the case, which payment methods still work, and walk step by step through how to set up a subscription using a virtual card.
What Plans Does ChatGPT Offer
The service has several pricing plans designed for different scenarios — from occasional use to team collaboration.
Free — a free plan with limited access to advanced models.
Plus — the most popular paid plan for individual users.
Pro — an expanded plan for those who need maximum capabilities.
Enterprise — for large companies with custom terms.
Paid subscriptions remove the main limitations of the free version — request limits, access to new models, image generation, voice mode, file handling, and advanced tools like data analysis. A detailed breakdown of each plan is covered below, in the subscription setup guide.
What Payment Methods Work
There are several working options. Each has its own strengths and limitations.
International Bank Cards
You can open an account at a bank in another country and get a physical or virtual card. This is the most stable route — the card works everywhere Visa or Mastercard is accepted.
There are downsides too. Crypto holders want to pay for services using their digital assets, and regular cards do not give them that option. Not all countries have access to international bank cards either.
Intermediaries and Resellers
These are services or individuals who sign up for a subscription on their own account and give you access, or pay for your subscription using their card for a markup.
The drawbacks are significant. Commissions are typically 20 to 40% on top. If they pay for your subscription — they need access to your account, which is a security risk. If they provide their own account — there is no guarantee it will keep working in a month. Your chat history is tied to someone else's account, and access can be lost at any time.
Virtual Cards
One of the most popular options for paying for AI services. A virtual card is the same as a bank card, just without the plastic. It has a number, expiry date, and CVV, and is accepted everywhere Visa or Mastercard works.
You can get such a card online in a couple of minutes, without visiting a bank or dealing with complicated documents. The card is linked to your own ChatGPT account, and the subscription stays under your control. If there are funds on the card, automatic renewals also go through without issues.
The key condition is choosing a service that reliably passes through OpenAI's anti-fraud systems. Not all virtual cards work equally well with ChatGPT.
Mirocard — A Way to Pay for ChatGPT Plus
Mirocard is a virtual card service for paying for services and subscriptions with cryptocurrency. The cards are issued under Visa and Mastercard, topped up with cryptocurrency, and work with ChatGPT, including the Plus plan.
For subscription payments, the subscriptions card is the right fit. It is specifically designed for recurring SaaS charges — ChatGPT, Notion, Spotify, Netflix, Figma, and others. Issuance costs $10, and the top-up fee is 4%.
The card is topped up with cryptocurrency, removing dependency on banks. Supported coins include ETH, USDC, USDT, AVAX, BCH, DAI, BNB, BTC, DASH, DOGE, POL, LTC, SOL, TON, TRX, XMR. If you have crypto on an exchange or in a wallet — that is all you need.
Multiple cards can be opened from a single account. This is convenient if you want to separate personal and work subscriptions or track budgets across different services.
How to Get a Mirocard Card
Here is the process step by step.
Step 1. Registration
Go to the Mirocard website and click "Get a Card."
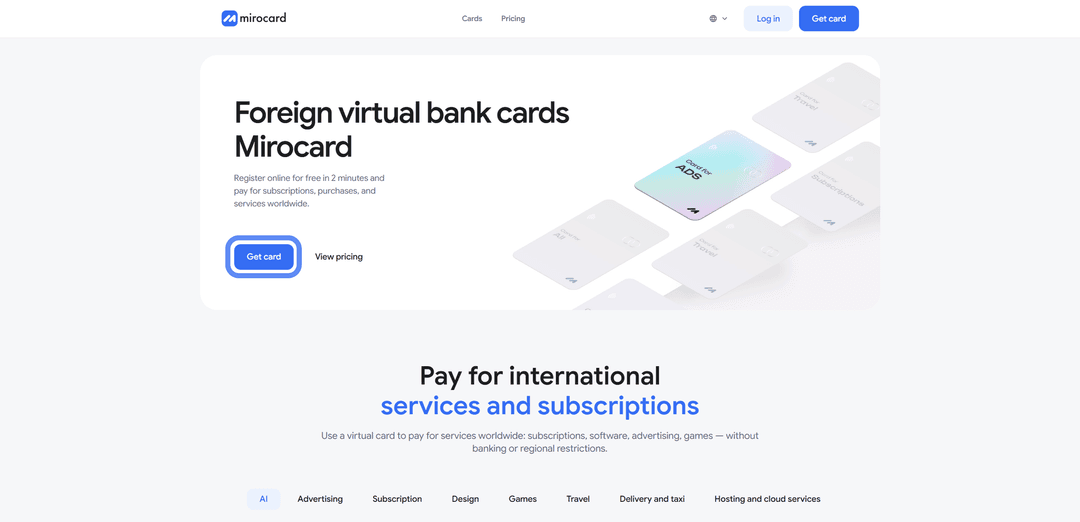
If you are on the platform for the first time, select "Register."
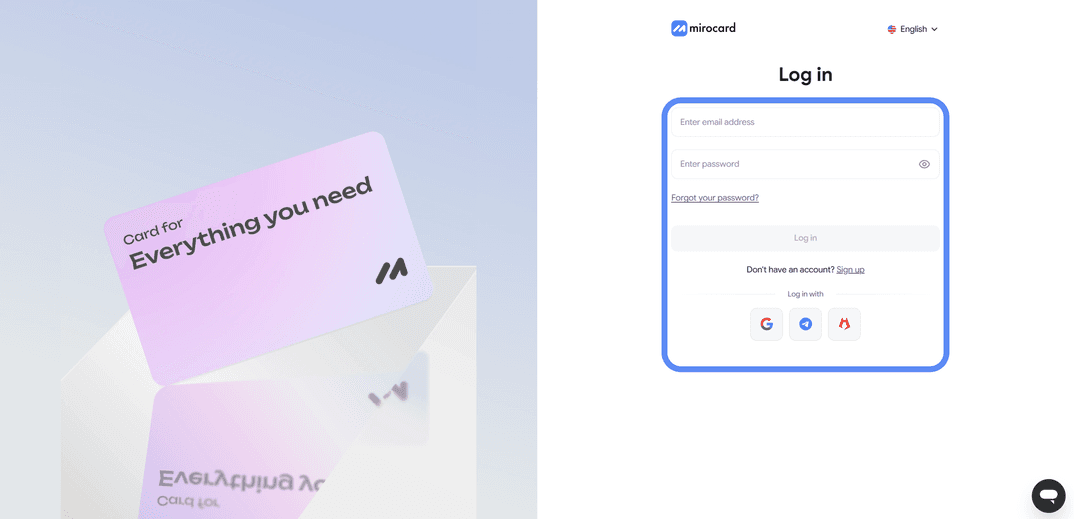
You will need a working email address — a confirmation link will be sent to it — and a password. If you already have a Heleket account, it is better to log in through it — all your funds and cards will transfer automatically.
Step 2. Top Up the Master Balance
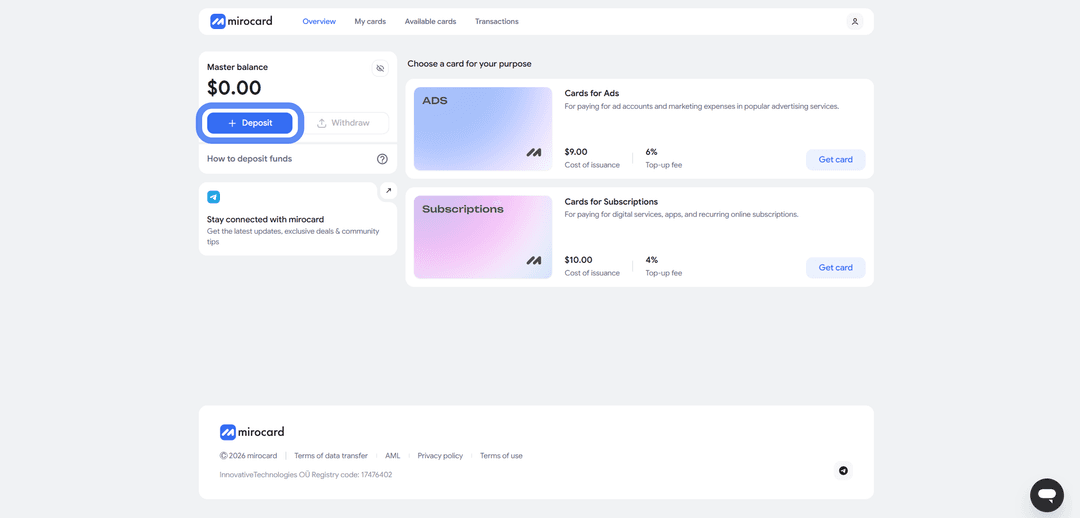
In your personal account, find the Master Balance block and click "Top Up."
A list of coins and networks will appear. Choose a suitable one — for example, USDT via TRC-20, which has one of the lowest transfer fees.
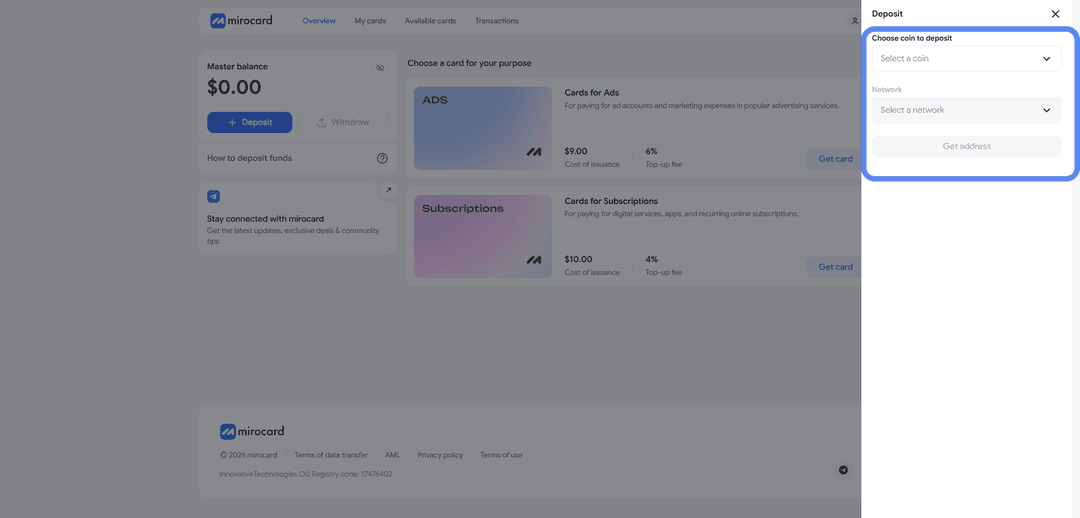
Click "Get Address" — the service will generate a wallet to which you need to transfer crypto from an exchange or external wallet. Funds will be credited after blockchain confirmation, usually within a few minutes.
Step 3. Choose a Card
After topping up the Master Balance, select the card you want to issue. For ChatGPT payments, the subscriptions card is the right fit.
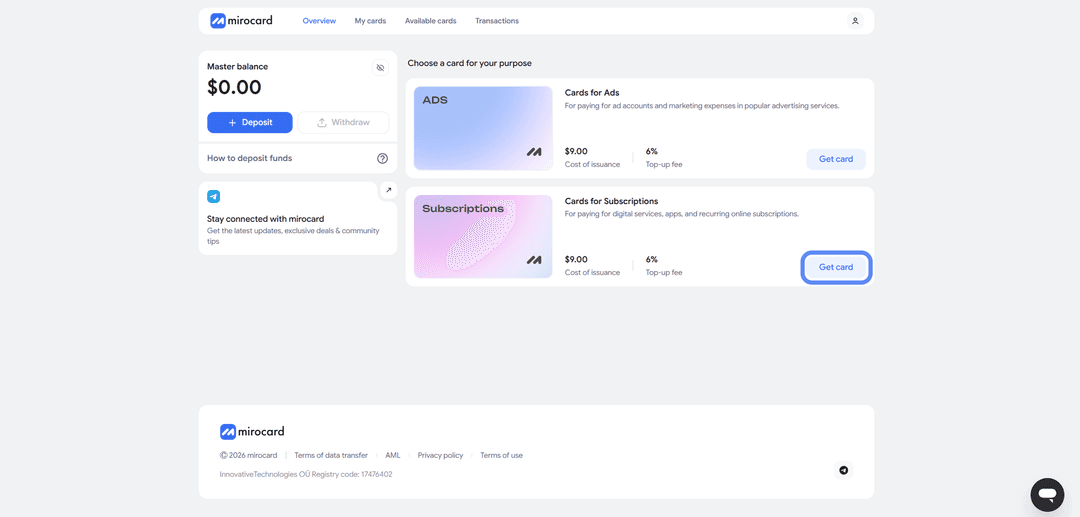
Click "Get Card" on the right side of the corresponding block — the issuance page will open.
Step 4. Verification
Before issuance, you need to complete verification and upload documents. This ensures that only you can manage your funds and link new cards.
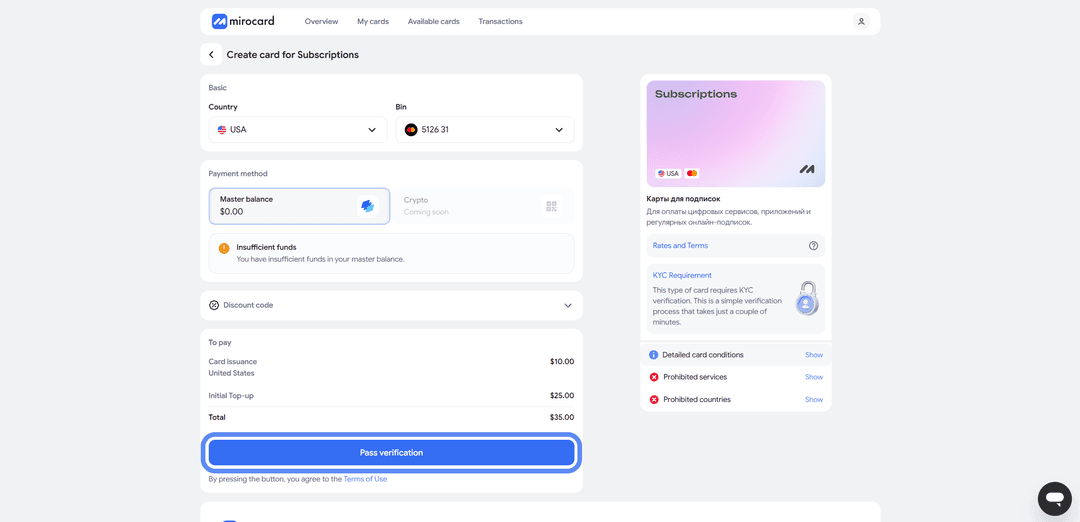
After the review, maximum purchase and top-up limits will become available.
Step 5. Pay for Issuance
On the same page, click "Deposit and Pay."
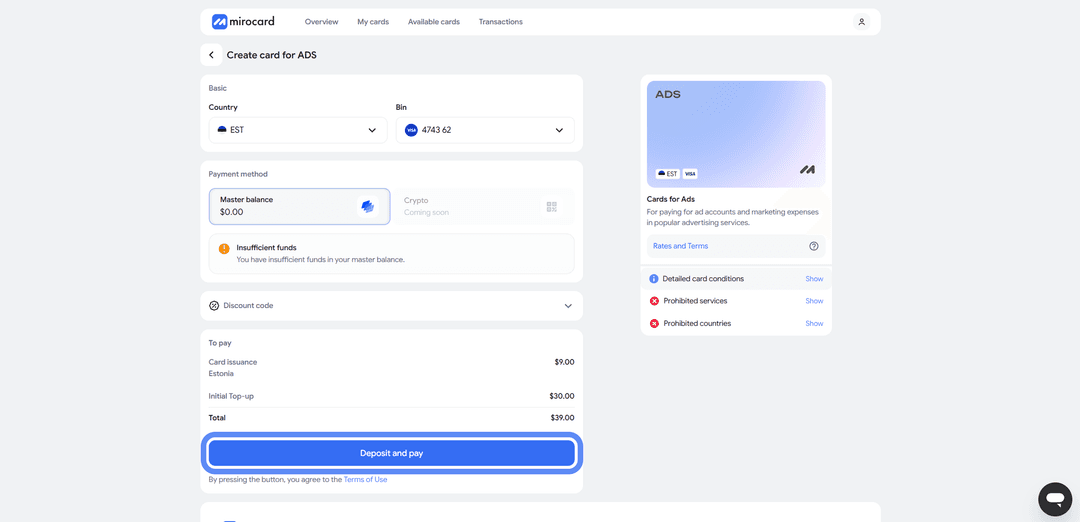
The issuance fee ($10) will be deducted from the Master Balance. The remaining amount will stay on the card account and be available for purchases.
Ready to Use
The card will appear in your personal account along with the current balance. Here you can see the card details, transaction history, and the top-up button. The card works immediately after issuance — no additional activation steps are needed.
A tip — put a little more on the card than the subscription costs. When paying for ChatGPT, the card's issuing bank may perform a pre-authorization — temporarily reserving a slightly larger amount to verify the card. After a successful transaction, the extra funds are returned, but if the balance is only just enough, the pre-auth block will fail and the payment will be declined. To prevent this, keep a $3–5 buffer on the card.
How to Pay for ChatGPT Plus via Mirocard
The card is ready — now let's set up the subscription.
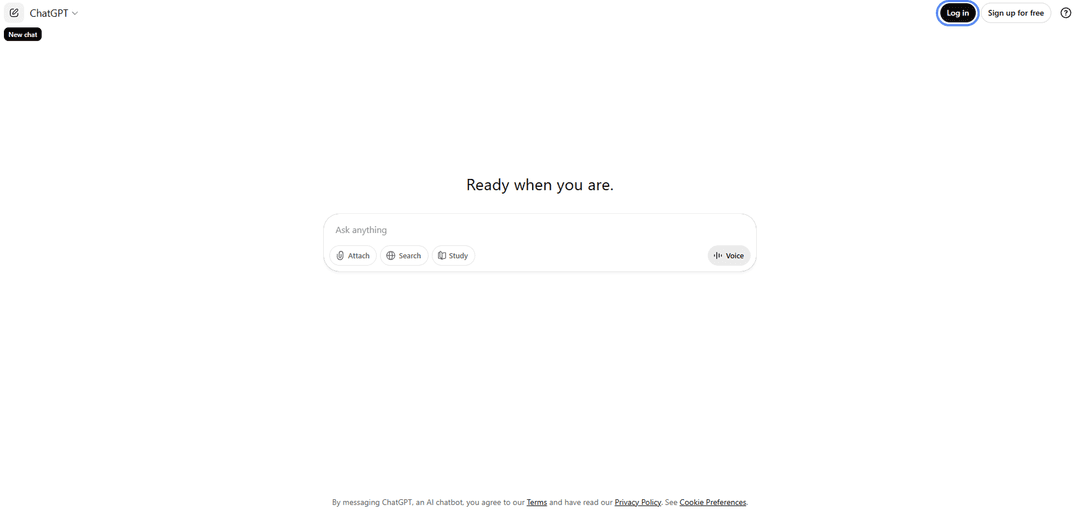
Step 1. Log Into Your ChatGPT Account
Open chatgpt.com and sign into your profile. If you don't have an account yet, click "Sign up for free" and create a new one — you can use email, Google, or Apple ID.
Step 2. Open the Plans Section
After logging in, click the profile icon at the bottom of the left panel and select "Upgrade plan."
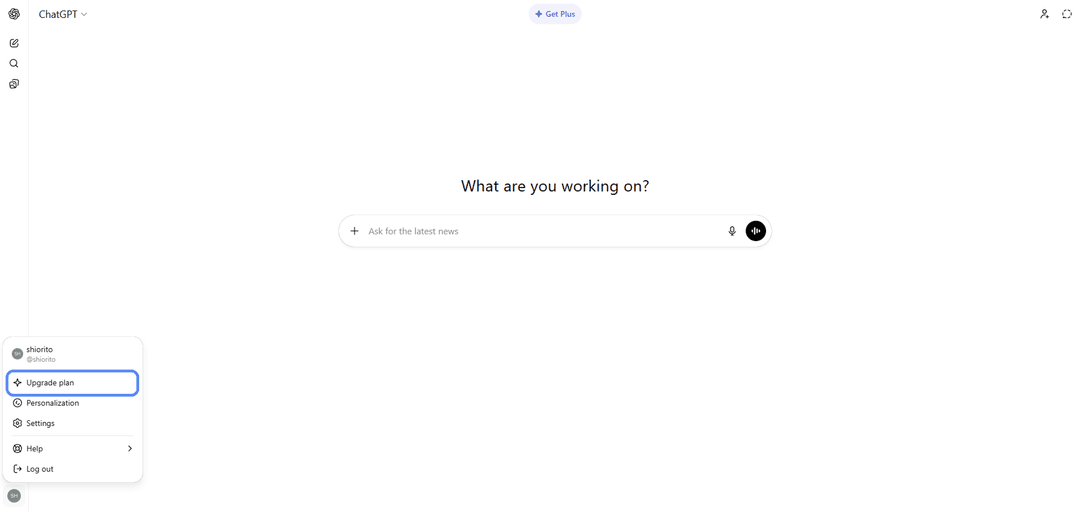
The plans page will open.
Step 3. Choose a Plan
On the plans page, compare the available options. Plans for personal use:
Free. A free plan with basic ChatGPT access. The GPT-4o model is available with a limited number of messages per day — once the limit is reached, the system switches to a simpler model. Suitable for occasional questions and experimenting with the service.
Plus. The most popular paid plan for individual users. The main restrictions are removed — an expanded limit for requests to advanced models, access to GPT-4o without switching, image generation via DALL-E, voice mode, advanced data analysis, and file handling. Suitable for those who use ChatGPT for work or study multiple times a day.
Pro. A plan for users with maximum demands. Includes near-unlimited access to top-tier models, an extended reasoning mode, and access to the platform's most powerful tools. Chosen by professionals who work with AI for several hours a day.
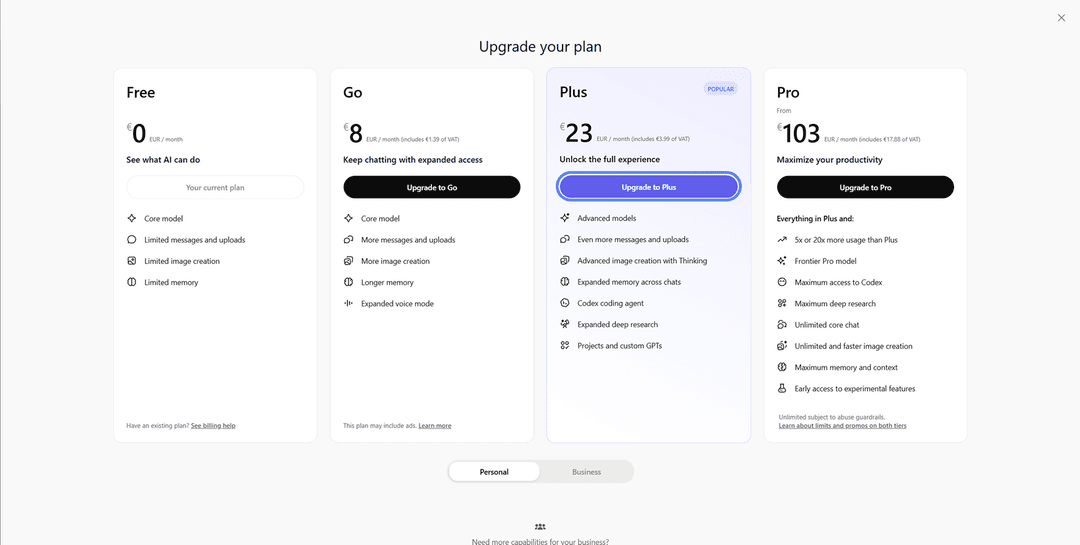
For most individual users, the optimal choice is Plus. Click "Get Plus" — the payment form will open.
Step 4. Enter the Card Details
In the payment form, enter the Mirocard card number, expiry date, CVV, and cardholder name — all of this data is available in your Mirocard personal account.
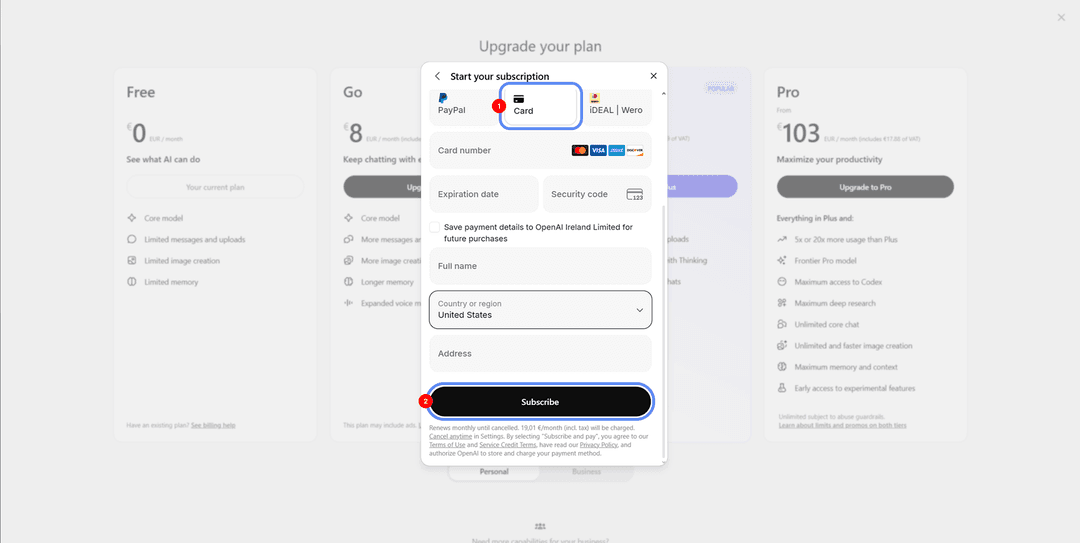
In the billing address field, enter any US address (for example, any real address from public sources such as stores or offices). This is needed so the system does not decline the transaction due to a region mismatch.
Step 5. Confirm the Payment
After entering the details, click the payment button. The charge is instant and the subscription activates immediately. A receipt will be sent to the email linked to your ChatGPT account. The subscription renews automatically every month. To cancel, go to the same settings section.
If the Payment Fails
First, check the card balance — there should be enough funds with some to spare (remember the pre-authorization). Make sure the details were entered correctly, especially the CVV. Verify that the card is active in your Mirocard personal account. If everything is set up correctly but the payment is still declined — try again in a few hours; OpenAI's anti-fraud system sometimes temporarily blocks suspicious transactions.
Who Might Need a Paid Subscription
ChatGPT Plus is useful well beyond entertainment. There are categories of professionals for whom a paid subscription pays for itself within a couple of days of work.
Developers. Plus unlocks work with large code blocks, advanced error analysis, and integration with development tools. Instead of an hour searching forums for a solution — a few minutes of dialogue with a model that sees the full context of your project.
Analysts and researchers. Advanced data analysis lets you upload tables, build charts, and get insights from large datasets. Plus also provides real-time web search access, which is invaluable when working with fresh data.
Content creators and marketers. Unlimited generation of text, images, and interview transcriptions. Voice mode helps quickly capture ideas on the go and turn them into ready content.
Entrepreneurs and managers. ChatGPT handles the routine — correspondence, drafting documents, preparing presentations, finding information. Plus removes the limits that kick in with the free version exactly during peak workloads.
Students and educators. Help with notes, explaining complex topics, reviewing work, generating project ideas. Plus is especially useful during exam periods, when you need to get through large volumes of material quickly.
Conclusion
With a Mirocard virtual card, you can pay for your favorite services using cryptocurrency. The setup process takes about half an hour the first time — registration at Mirocard, top-up, card issuance, payment. After that, everything runs in the background — the subscription renews automatically, and you can simply use the service without constantly worrying about whether the next payment will go through.
If ChatGPT is part of your everyday work, the investment in a virtual card pays off within the first couple of payments. And with one card you can pay not only for ChatGPT but for dozens of other services — from Notion and Spotify to cloud storage and gaming platforms.