How to Pay for Starlink with Cryptocurrency
#Payment Instructions
Starlink is satellite internet from SpaceX. The connection doesn't go through a cable or cell tower — it comes directly from satellites in orbit. You install a small dish antenna, point it at the sky, and it picks up the signal from the satellites. This gives you internet access in places where conventional providers can't reach.
Not everyone can pay for the service directly. Some users keep their funds in cryptocurrency, which Starlink doesn't accept. Others have bank cards that don't support international payments. Let's break down both situations and show a working solution.
What Starlink Is
Starlink delivers fast internet in almost any location in the world. The core value of the service is coverage where there are no wired lines or cell service. A countryside home, a remote village, a farm, a construction site in a field, a ship at sea — anywhere the sky is visible, Starlink picks up the signal.
Starlink's satellite internet speeds are comparable to a standard wired connection. That's enough for video calls, streaming, online gaming, and remote work. Satellite internet used to be slow and expensive; Starlink made it fast and affordable — and that's why users around the world value it.
The service operates in more than 160 countries and continues to expand. For travelers and those who frequently change location, there's a dedicated mobile plan that works on the move.
What You Need to Use Starlink
Three things are required to connect. Without any one of them, the service won't work.
First — the hardware kit. It includes the satellite dish antenna and a router that distributes internet via Wi-Fi. This is a one-time purchase at the time of connection — without it, there's no way to receive the satellite signal. In some regions the kit is available as a rental, in which case it's paid for monthly.
Second — a Starlink account. Through the dashboard you place an order, choose a plan, and manage your subscription and payments. Registration is done via email.
Third — an international payment method. Starlink operates through international payment infrastructure, so a card that supports such payments is required. This is the main difficulty for most users, and we'll cover it in more detail below.
How Starlink Billing Works
Starlink billing has several components, and it's important to understand each one to avoid surprises.
Hardware Purchase
When connecting, you need to pay for the starter hardware kit — the dish and the router. This is a one-time upfront payment. In some countries, renting the kit is available instead of buying, in which case the hardware is paid monthly alongside the subscription. Shipping is added on top of the hardware cost.
Monthly Subscription
Internet access is provided by subscription — you pay for it every month. The cost depends on the plan and country. For example, there's a Residential plan for stationary home use and a Roam plan for travel. The first month is typically charged immediately after the hardware is activated.
Automatic Charges
The subscription renews automatically. For uninterrupted service, it's important that the linked payment method is current and has sufficient funds. If a charge fails, internet access will be suspended until payment is made. The card needs to stay active and topped up.
International Billing
All payments go through international payment infrastructure. Starlink bills in the regional currency and processes payments as international transactions. This means the card must support international operations — local cards cut off from that infrastructure won't work.
Payment Methods Users Rely On
There are several working options, and the right one depends on what funds you have available.
International Bank Cards
A Visa or Mastercard that supports international transactions is the primary way to pay for Starlink. The service accepts it directly for both hardware and subscription.
For cryptocurrency holders there's a limitation — a regular card doesn't work with crypto. To pay with one, crypto assets first need to be sold on an exchange, fiat withdrawn to an account, and only then the card linked. At every step a portion of the funds goes to fees. On top of that, opening an account at a bank in another country is usually not straightforward — a personal visit and proof of address are typically required.
Other Payment Instruments
In some countries Starlink supports additional methods — PayPal, Apple Pay, Google Pay, and local payment services like Sofort or Klarna. These are convenient if you already have such an instrument set up.
But almost all of them are ultimately tied to a bank account or card and only work with fiat money. For crypto holders this doesn't solve the problem — spending crypto assets directly through these methods isn't possible. Availability also varies by country.
Virtual Cards
A virtual card is a bank card without the plastic — with a card number, expiry date, and CVV. Starlink accepts it like a standard international card, for both hardware and subscription.
The key advantage for crypto holders is that some virtual card services can be topped up directly with cryptocurrency. Crypto goes onto the card, and from there a standard payment goes to Starlink. No exchanges or bank accounts needed. The card is issued online in minutes, which is convenient when you need to pay for an order quickly.
| Payment method | Works with crypto | Setup complexity | |
|---|---|---|---|
| International bank cards | Works with cryptoNo, requires conversion through an exchange | Setup complexityHigh — opening a bank account requires a personal visit; not available in all countries | |
| PayPal, Apple/Google Pay, local services | Works with cryptoNo, fiat only | Setup complexityLow — can be set up quickly | |
| Virtual cards (Mirocard) | Works with cryptoYes, direct crypto top-up | Setup complexityLow — issued online in minutes |
Mirocard and Starlink — How to Get a Card and Pay for the Service
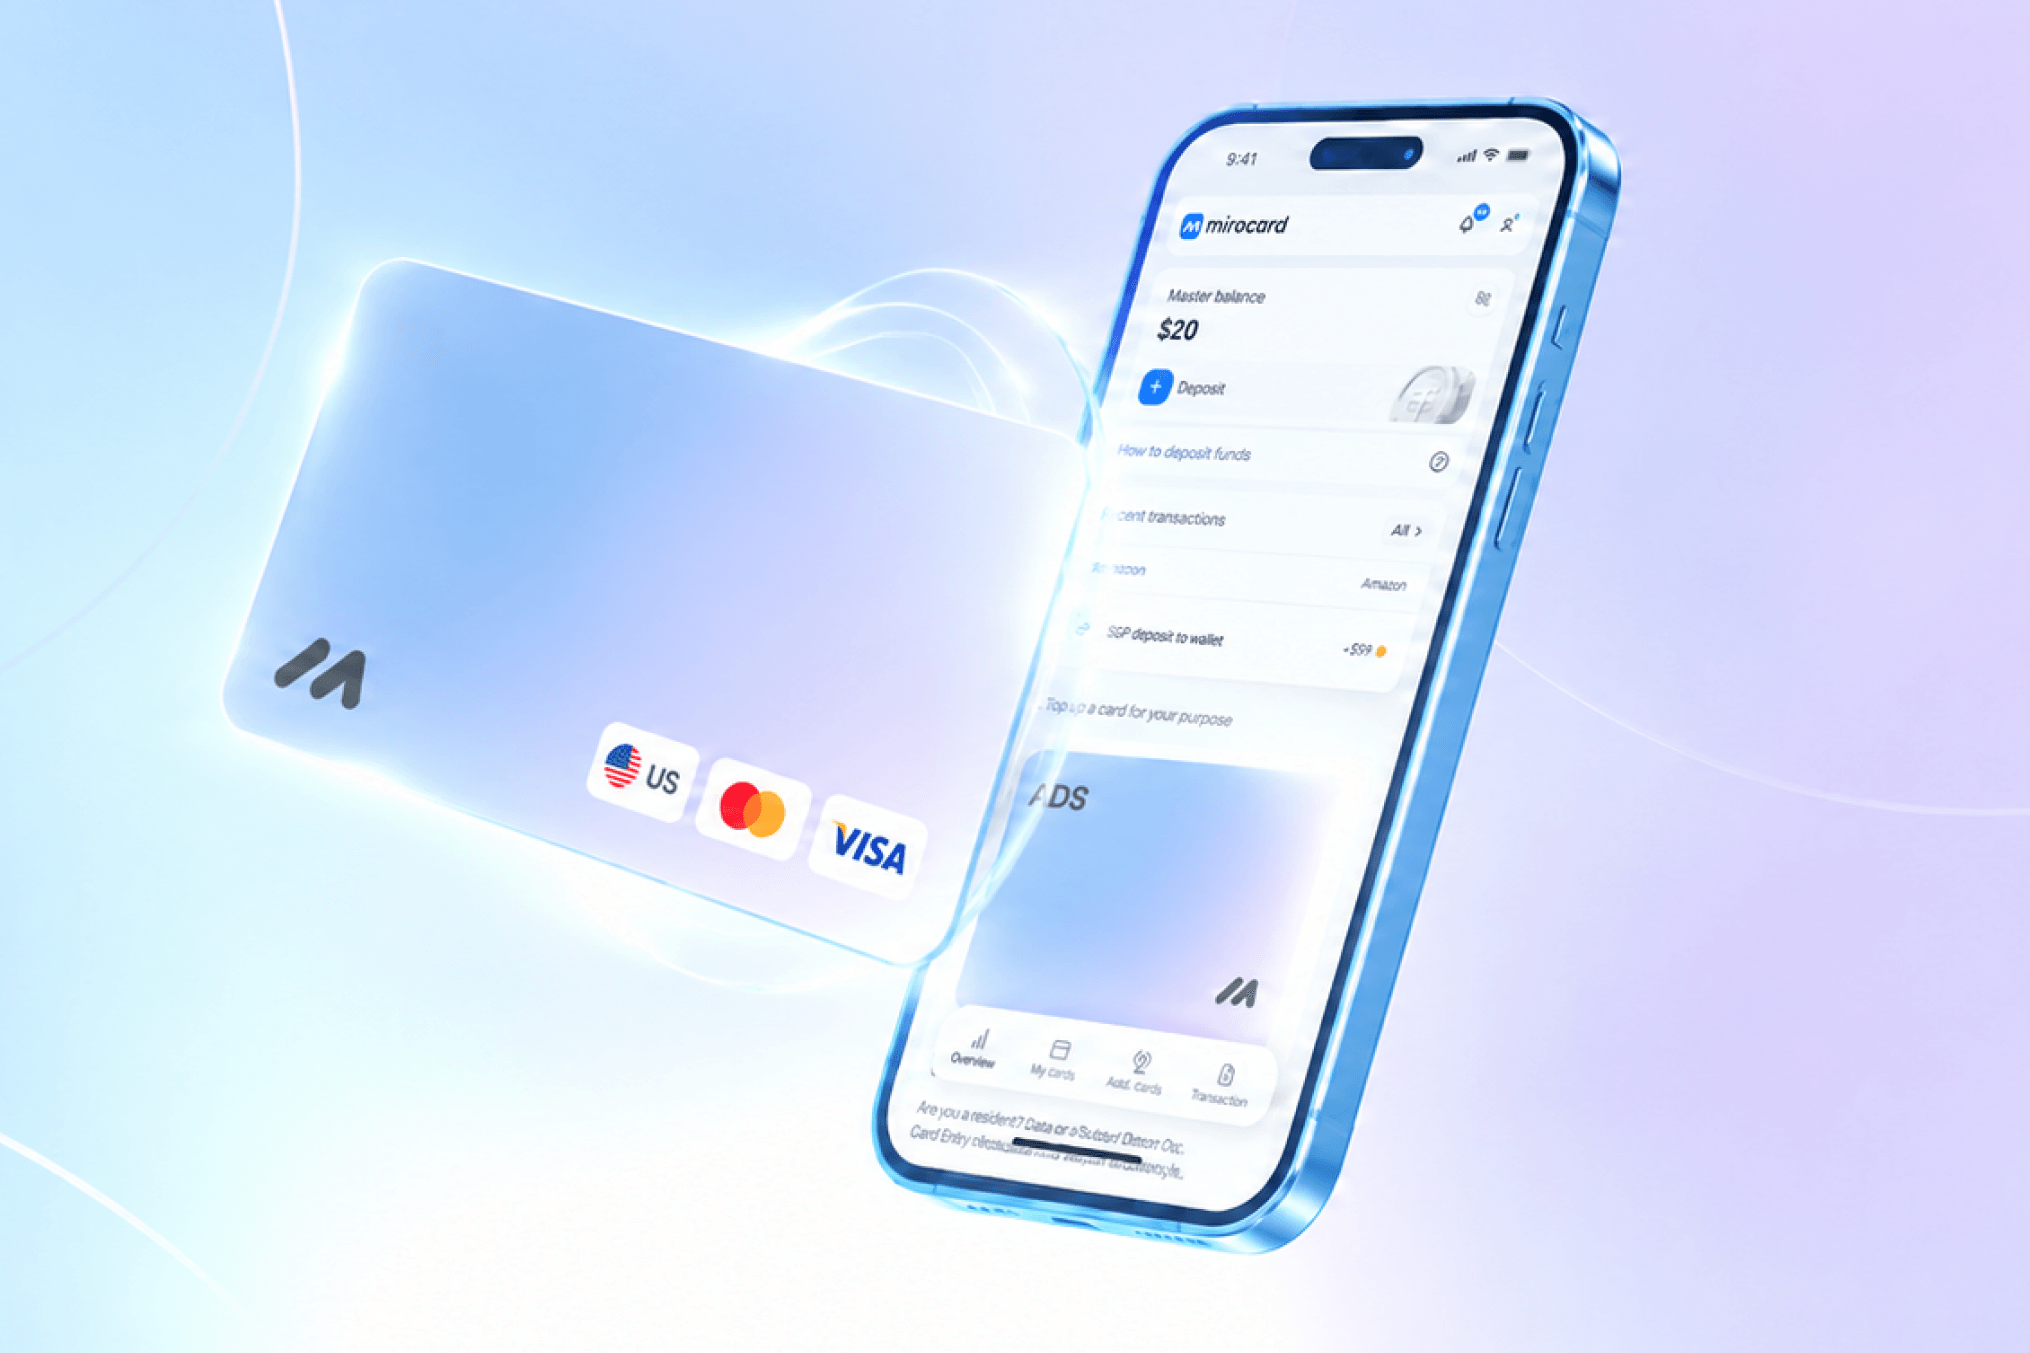
Mirocard is a virtual card service for paying international services and subscriptions. Cards are issued under Visa and Mastercard, topped up with cryptocurrency, and accepted by Starlink as standard international cards.
For paying for Starlink, the subscription card is the right fit. It's designed for recurring charges, so the monthly internet fee will go through automatically, and the one-time hardware purchase can be covered with the same card. Issuance costs $10, and the top-up fee is 4%. The card's US BIN means Starlink recognizes it as a card from the United States.
The card is topped up via ETH, USDC, USDT, AVAX, BCH, DAI, BNB, BTC, DASH, DOGE, POL, LTC, SOL, TON, TRX, and XMR. A transfer from an exchange or wallet takes a few minutes, and funds are immediately available for payment.
One card can pay for more than just Starlink. It works with streaming services, games, AI services, and other international platforms. All charges go directly from the crypto wallet, without cashing out to fiat.
How to Get a Mirocard
The process is fully online and usually takes less than half an hour.
Step 1. Registration
Open the Mirocard website and click «Get Card».
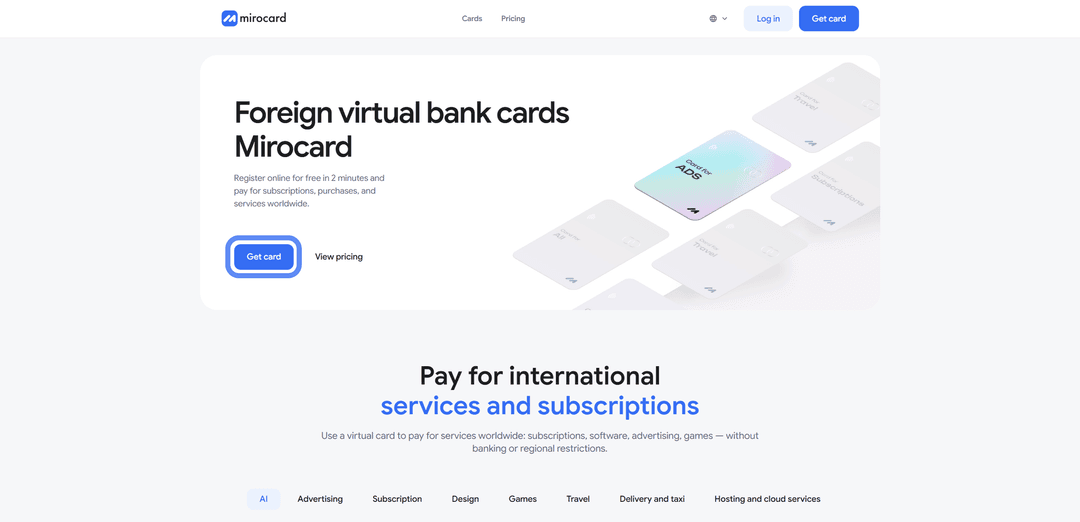
If you're new to the platform, select «Sign Up».
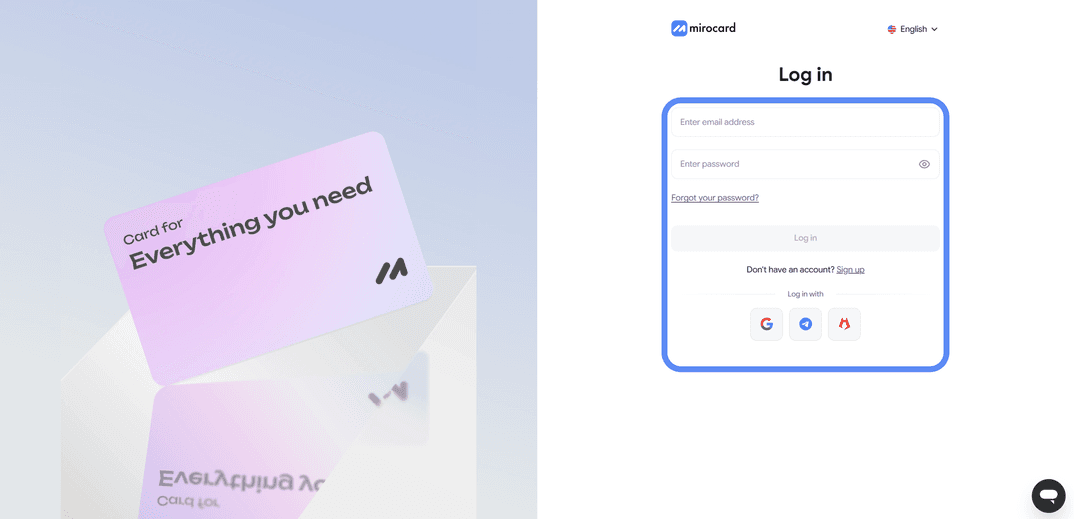
You'll need a working email and password — a confirmation link will be sent to your inbox. If you have a Heleket account, sign in through it and all your funds and cards will transfer to Mirocard automatically.
Step 2. Top Up Your Master Balance
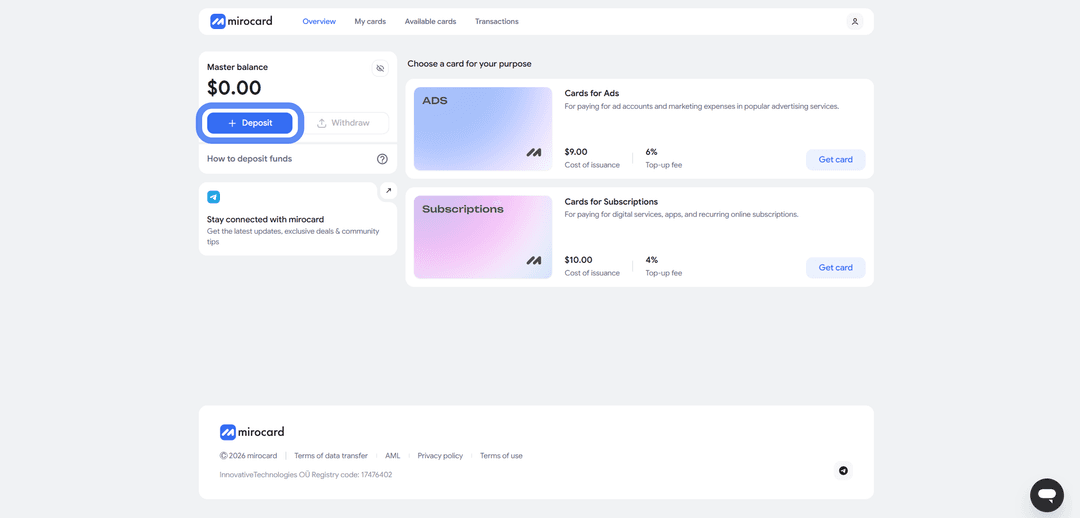
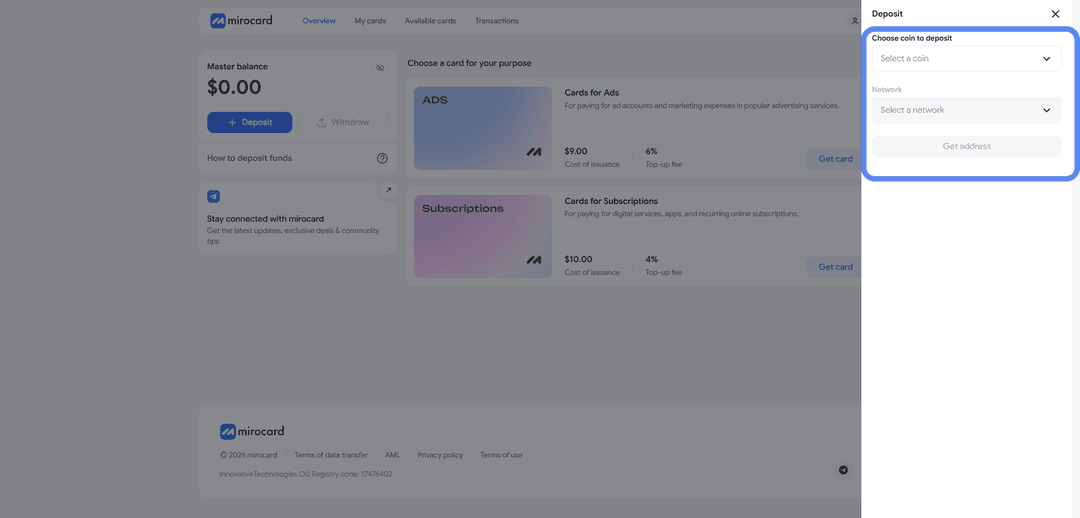
The lowest transfer fee option is USDT on the TRC-20 network. The service will provide a wallet address — send crypto to it from an exchange or external wallet. The balance will be credited after the transaction is confirmed on the blockchain.
Step 3. Select a Card
In the catalog, select the subscription card and click «Get Card» on the right side of the block.
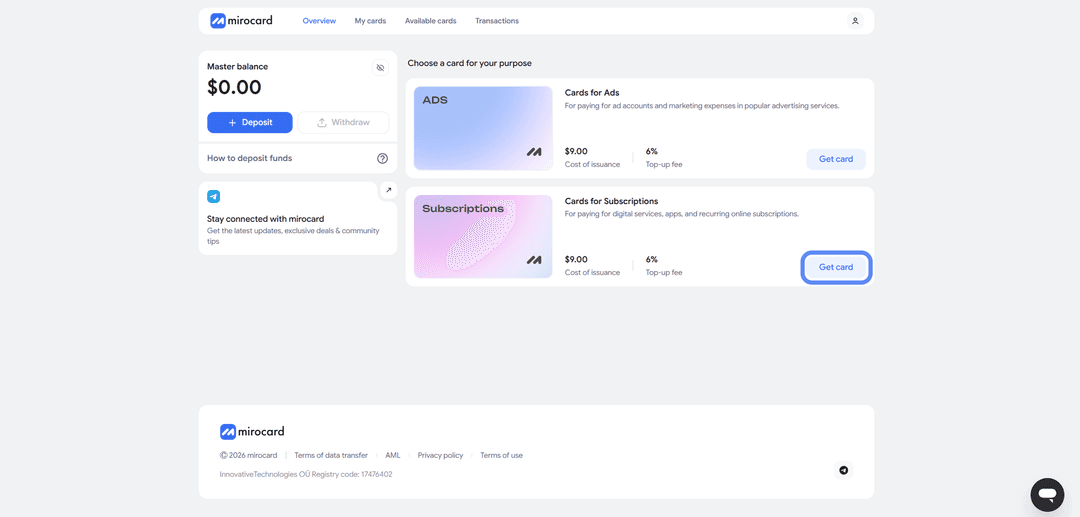
The issuance page will open.
Step 4. Verification
Before issuance, you'll need to upload documents for verification.
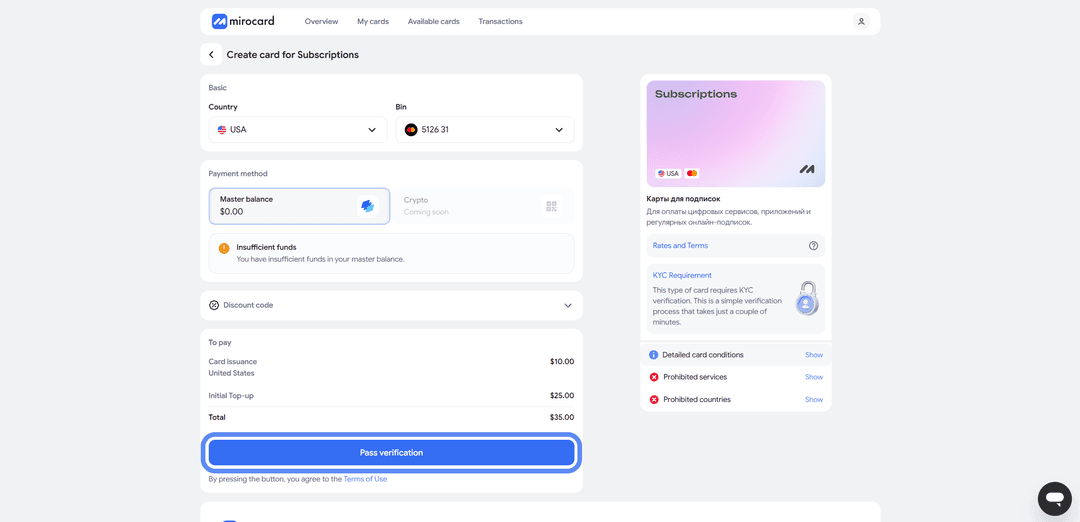
This protects your balance — only you will be able to manage it and link new cards. After verification, maximum top-up and spending limits become available.
Step 5. Pay for Issuance
On the issuance page, click «Deposit and Pay».
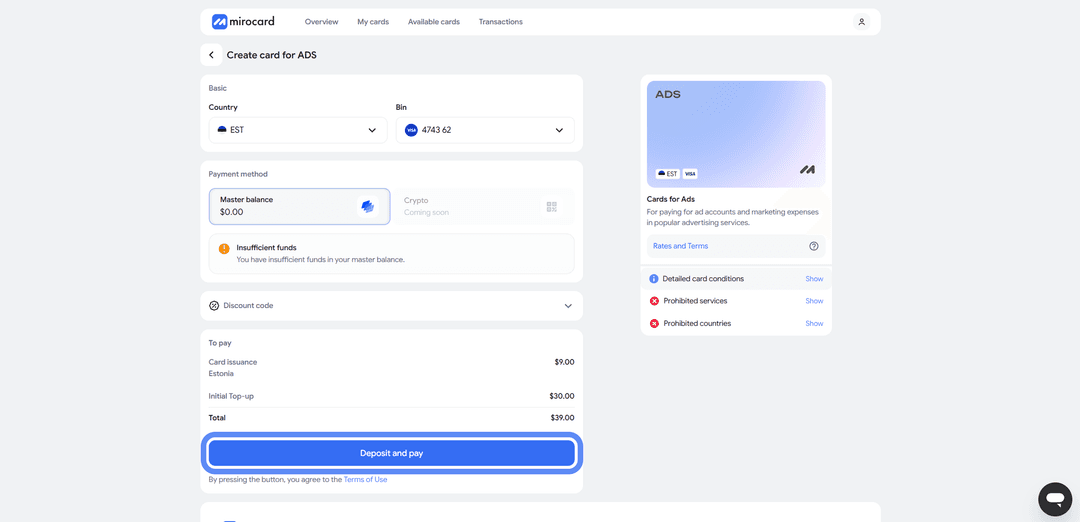
The issuance fee of $10 will be deducted from your Master Balance. The remaining amount will go to your card account and be ready for payment.
Step 6. Card Is Ready
The card will appear in your dashboard with its details and balance. No activation needed — it accepts payments immediately. The dashboard provides access to transaction history, top-ups, and the option to freeze the card if needed.
A tip — load the card with a buffer. Starlink charges for several items at once — hardware or its rental, shipping, and the first month's subscription. Before ordering, calculate the total on the payment page and make sure the card has enough funds with a small buffer for the card verification hold.
How to Pay for Starlink via Mirocard
Once the card is ready, placing the order takes a few minutes.
Step 1. Start the Order
Go to the Starlink website and click «Get Started».
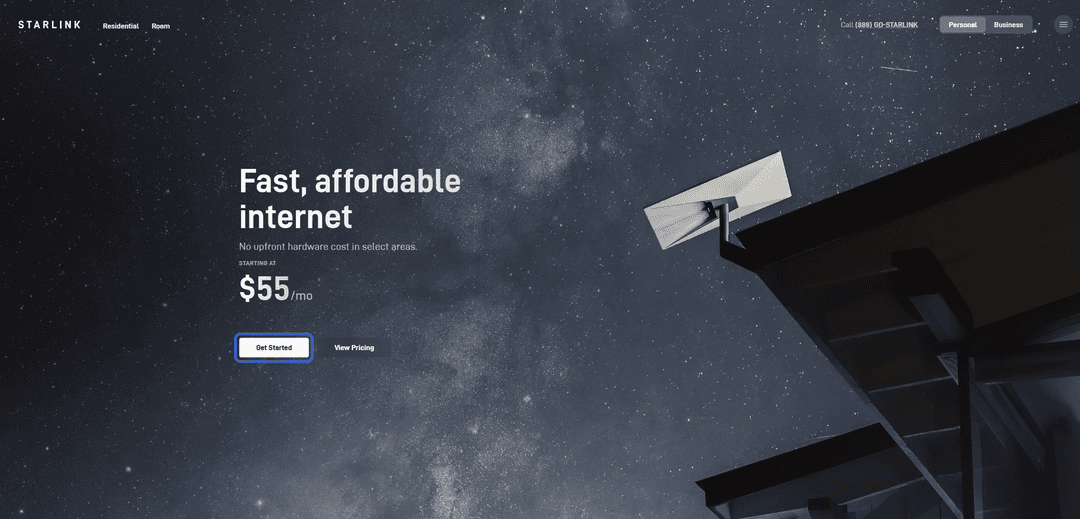
The service will prompt you to select a usage type.
Step 2. Choose a Plan and Address
Select the plan that fits your needs — Residential for stationary home internet or Roam for use while traveling across different countries.
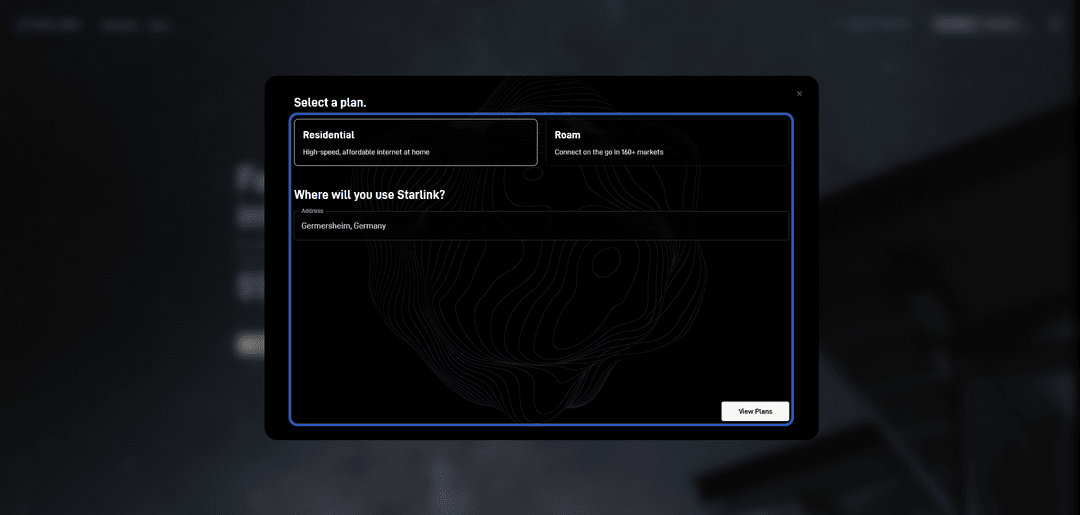
Then enter the address where you'll be using Starlink. The service uses it to check connection availability in your region. After entering the address, click «Show All Plans».
Step 3. Review Order Details
On the order page, select a speed option based on your needs. There are typically several: 100 Mbps, 200 Mbps, and Max (up to 400 Mbps). For basic work and everyday tasks with up to three users, 100 Mbps is sufficient. But if you plan to stream in 4K, download large files, or have four or more users on the network, a higher-tier option is worth considering.
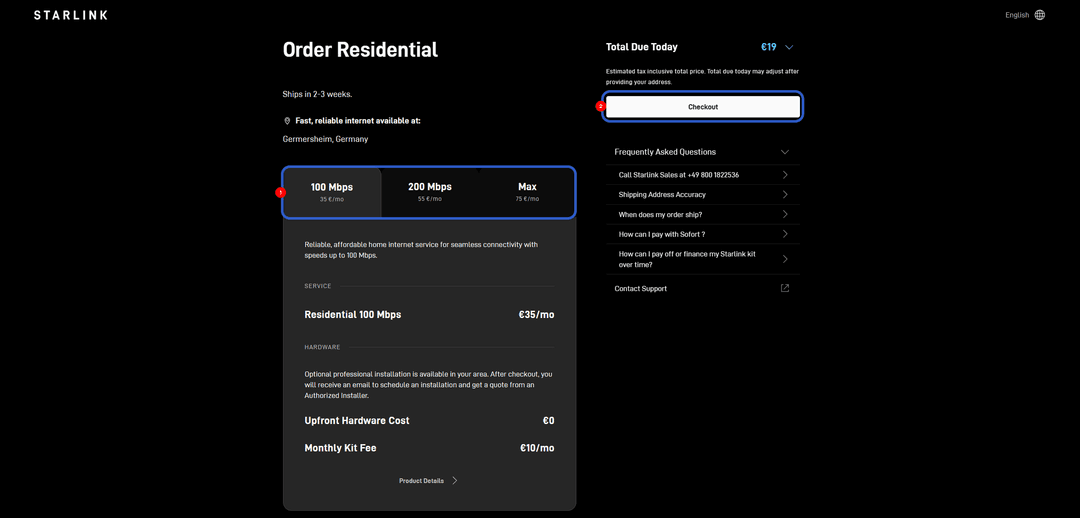
Also review the order breakdown — hardware, shipping, and monthly fee. The total will appear at the bottom — click «Proceed to Payment».
Step 4. Fill In Details and Pay
Enter your contact information and shipping address. In the payment section, select «Card» as the payment method and fill in the fields with your Mirocard virtual card details — cardholder name, card number, expiry date, security code, and the ZIP code of the billing address.
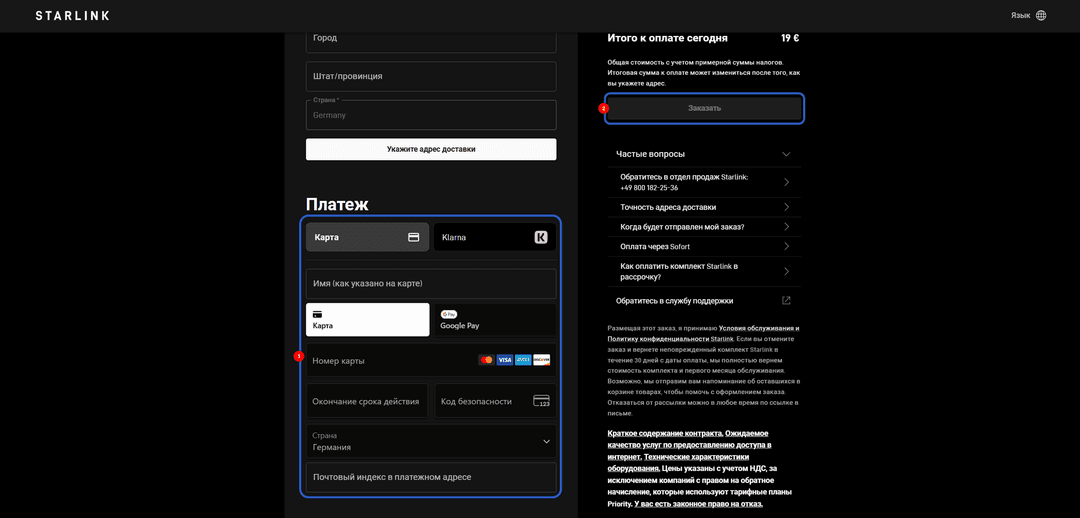
All details are available in your Mirocard dashboard. Enter the country that corresponds to the card and click «Order».
Step 5. Confirmation
After payment, Starlink will confirm the order and send details to your email — hardware delivery timelines and setup instructions. The monthly subscription will be charged to the card automatically from then on. Payment and subscription can be managed in the Starlink dashboard.
If the Payment Fails
Check your card balance accounting for all order items and the verification hold. Make sure the details are entered correctly, especially the security code and ZIP code. If everything looks right but the payment is still declined, check that the card's country matches the address, then try again after a few minutes.
Conclusion
There are several ways to pay for Starlink. International bank cards work directly but are complicated to obtain and don't support crypto payments. Other payment instruments are tied to fiat and not available everywhere. Virtual cards strike a balance in terms of speed, cost, and crypto compatibility.
Mirocard in this setup works like a regular Visa but is topped up with cryptocurrency. Set it up once and pay for both the hardware and the monthly subscription directly from your crypto wallet, without cashing out through exchanges. The same card works for other international services too.
For cryptocurrency holders, this is a short path from crypto assets to paying for internet — with no losses on unnecessary conversions. And for those who can't access standard international cards, a virtual card remains a practical way to connect and pay for Starlink.